15 KiB
Plugin Development Guide
TOC
- Plugin Composition
- Custom Plugin Workflow
- Local Plugin Development
- Plugin Deployment and Publication
- Link
Plugin Composition
A LobeChat plugin consists of the following components:
- Plugin Index: Used to display basic information about the plugin, including the plugin name, description, author, version, and a link to the plugin manifest. The official plugin index can be found at lobe-chat-plugins. To submit a plugin to the official plugin marketplace, you need to submit a PR to this repository.
- Plugin Manifest: Used to describe the functionality of the plugin, including the server-side description, frontend display information, and version number. For more details about the manifest, please refer to the manifest.
- Plugin Services: Used to implement the server-side and frontend modules described in the manifest:
- Server-side: Implement the API capabilities described in the manifest.
- Frontend UI (optional): Implement the interface described in the manifest, which will be displayed in plugin messages to provide richer information display than plain text.
Custom Plugin Workflow
To integrate a plugin into LobeChat, you need to add and use a custom plugin in LobeChat. This section will guide you through the process.
1 Create and Start a Plugin Project
First, you need to create a plugin project locally. You can use the lobe-chat-plugin-template template we have prepared:
$ git clone https://github.com/lobehub/chat-plugin-template.git
$ cd chat-plugin-template
$ npm i
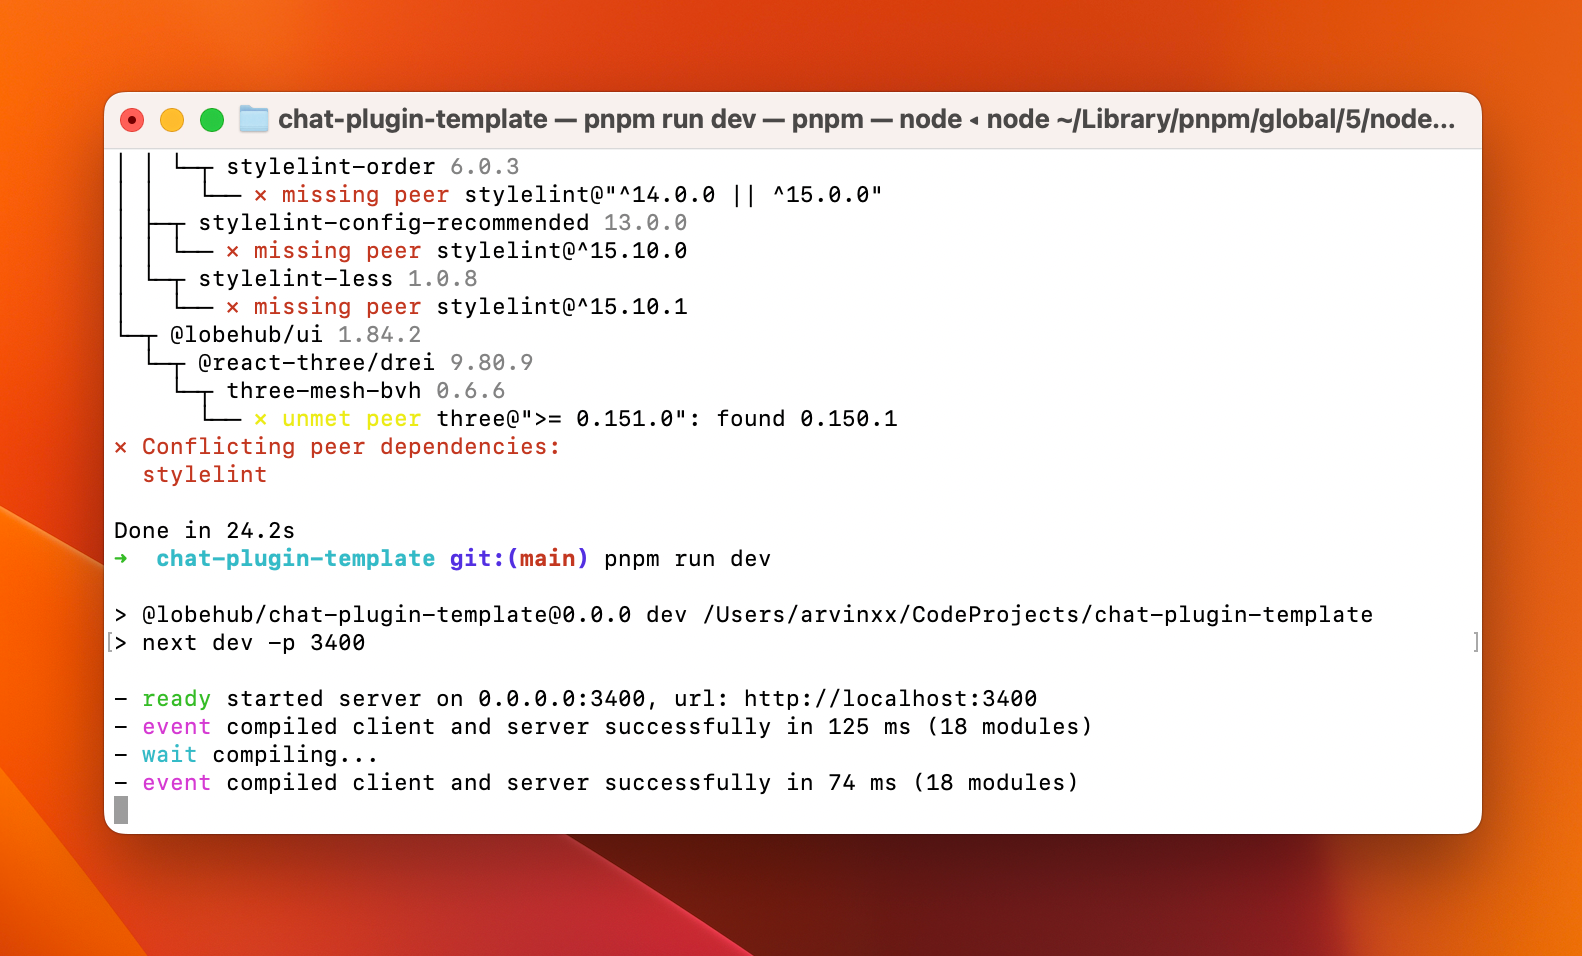
$ npm run dev
When you see ready started server on 0.0.0.0:3400, url: http://localhost:3400, it means that the plugin service has been successfully started locally.
2 Add the Local Plugin in LobeChat Role Settings
Next, go to LobeChat, create a new assistant, and go to its session settings page:
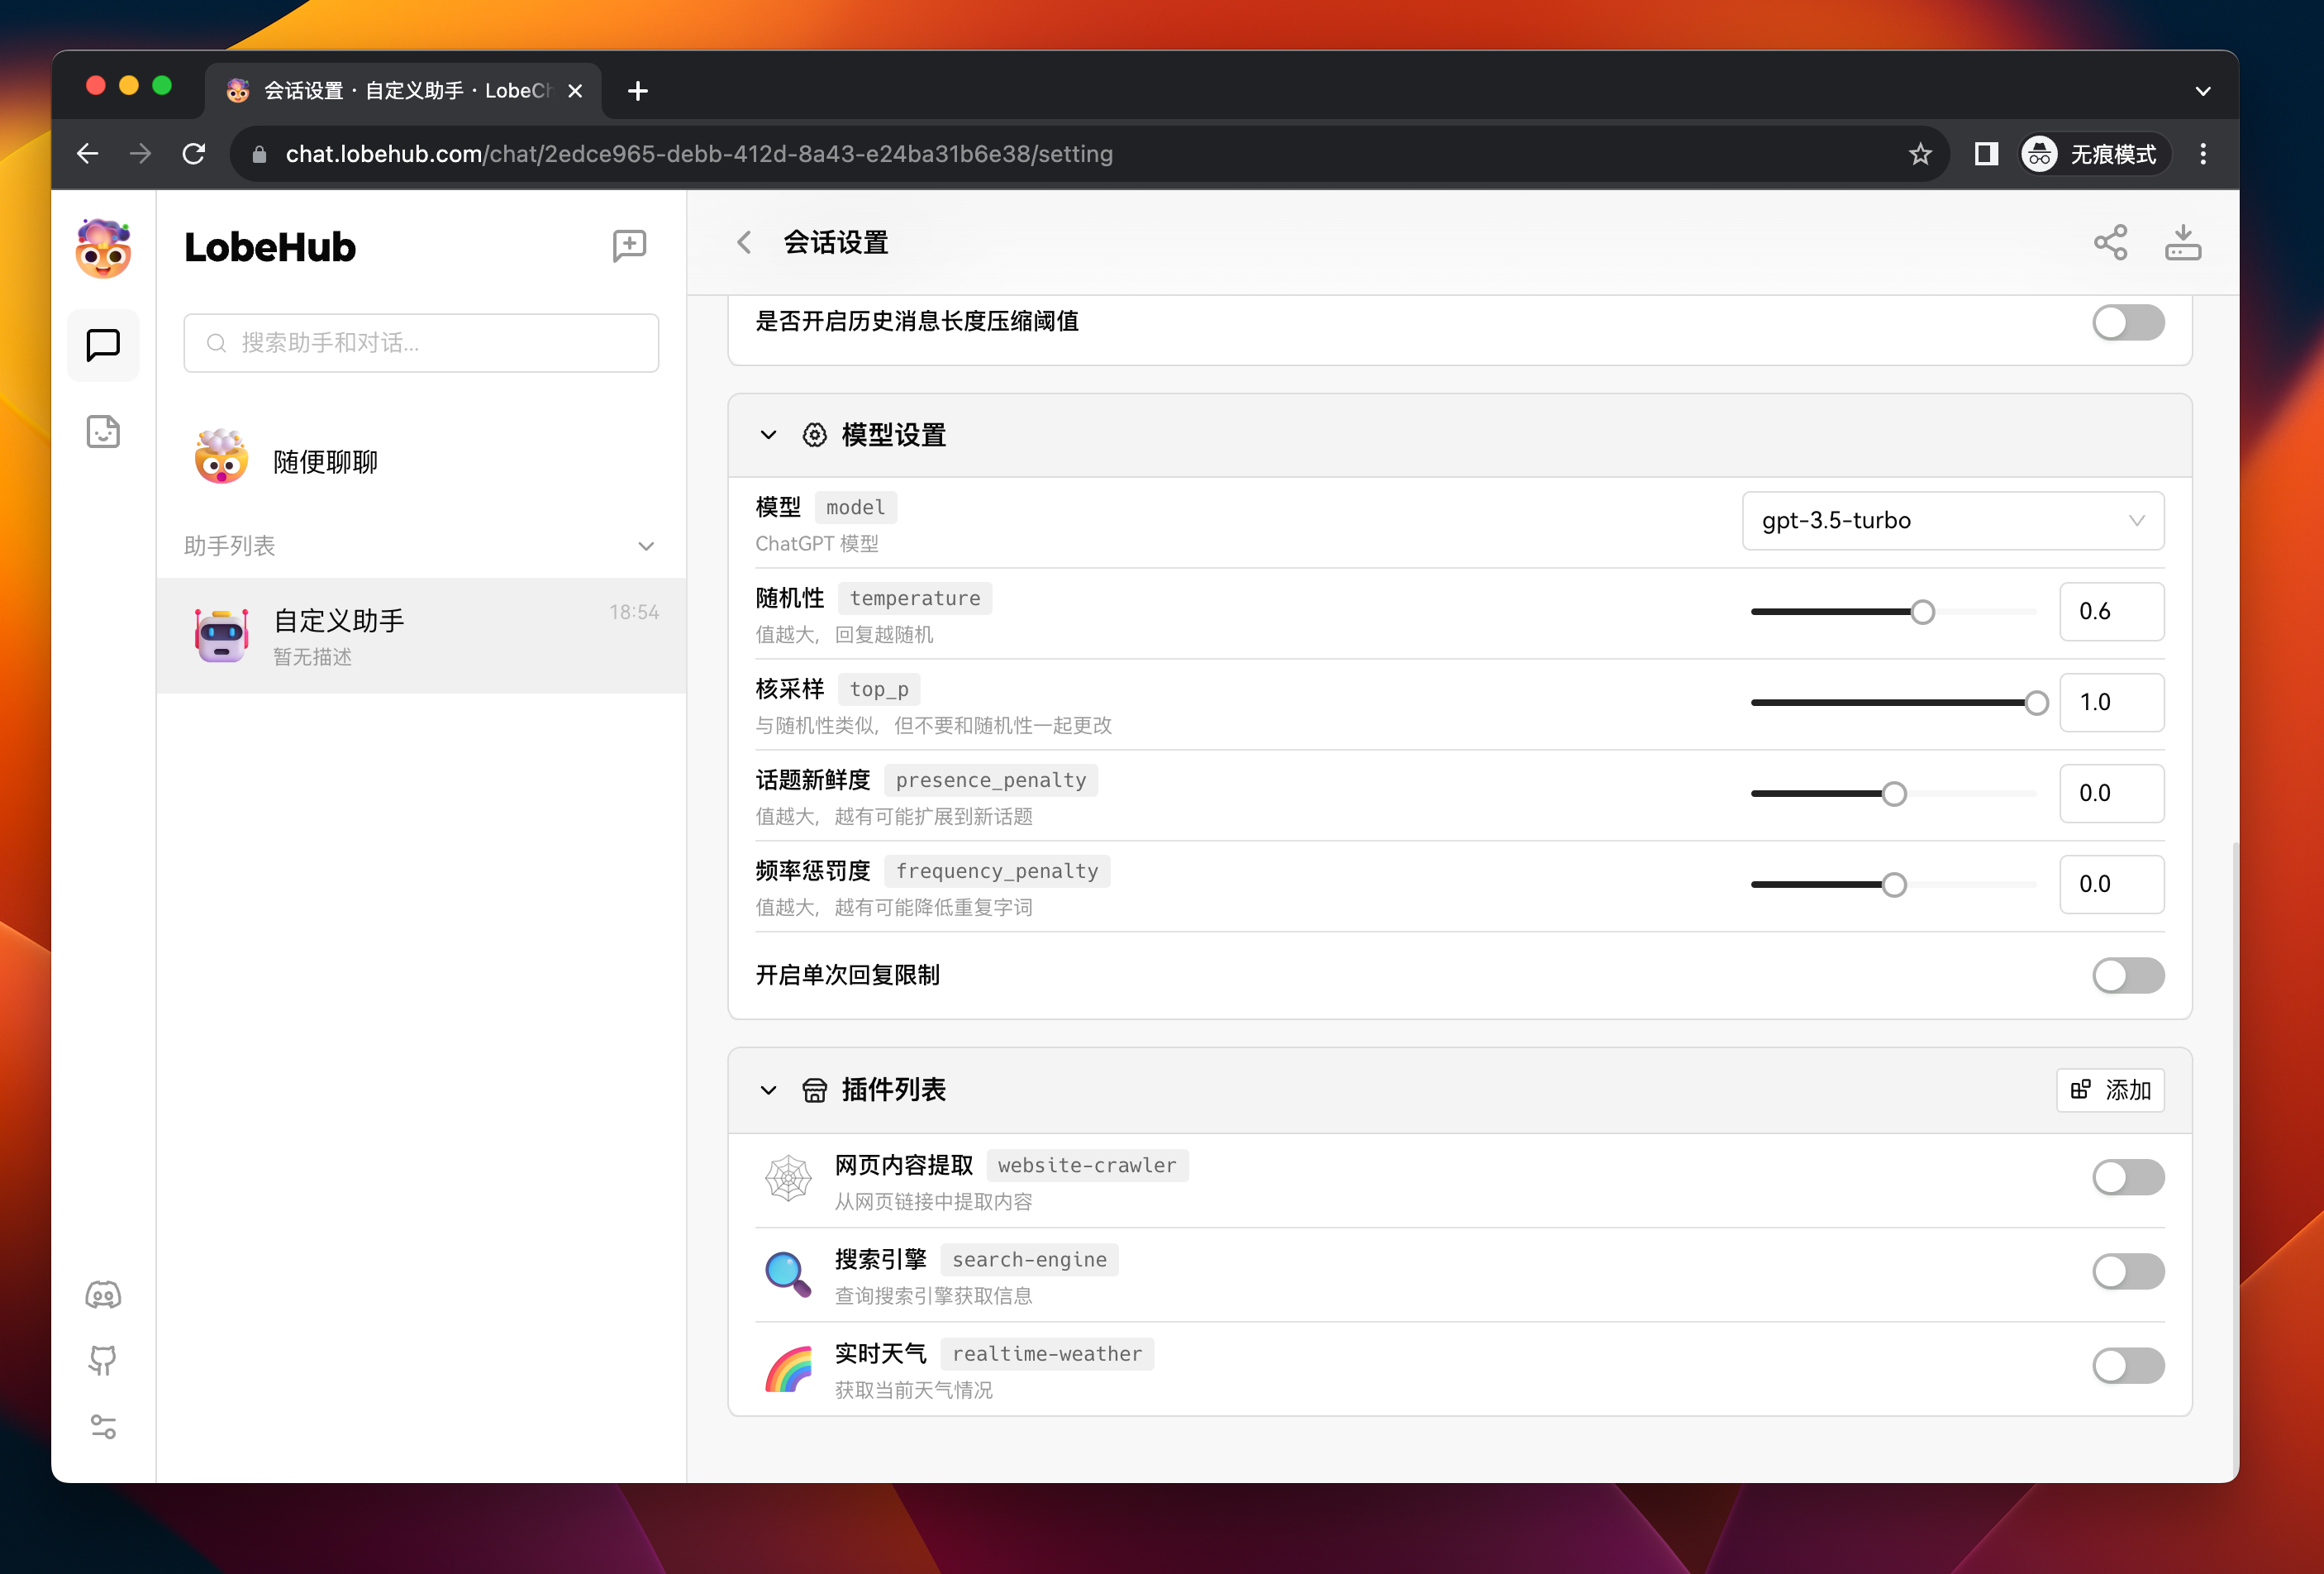
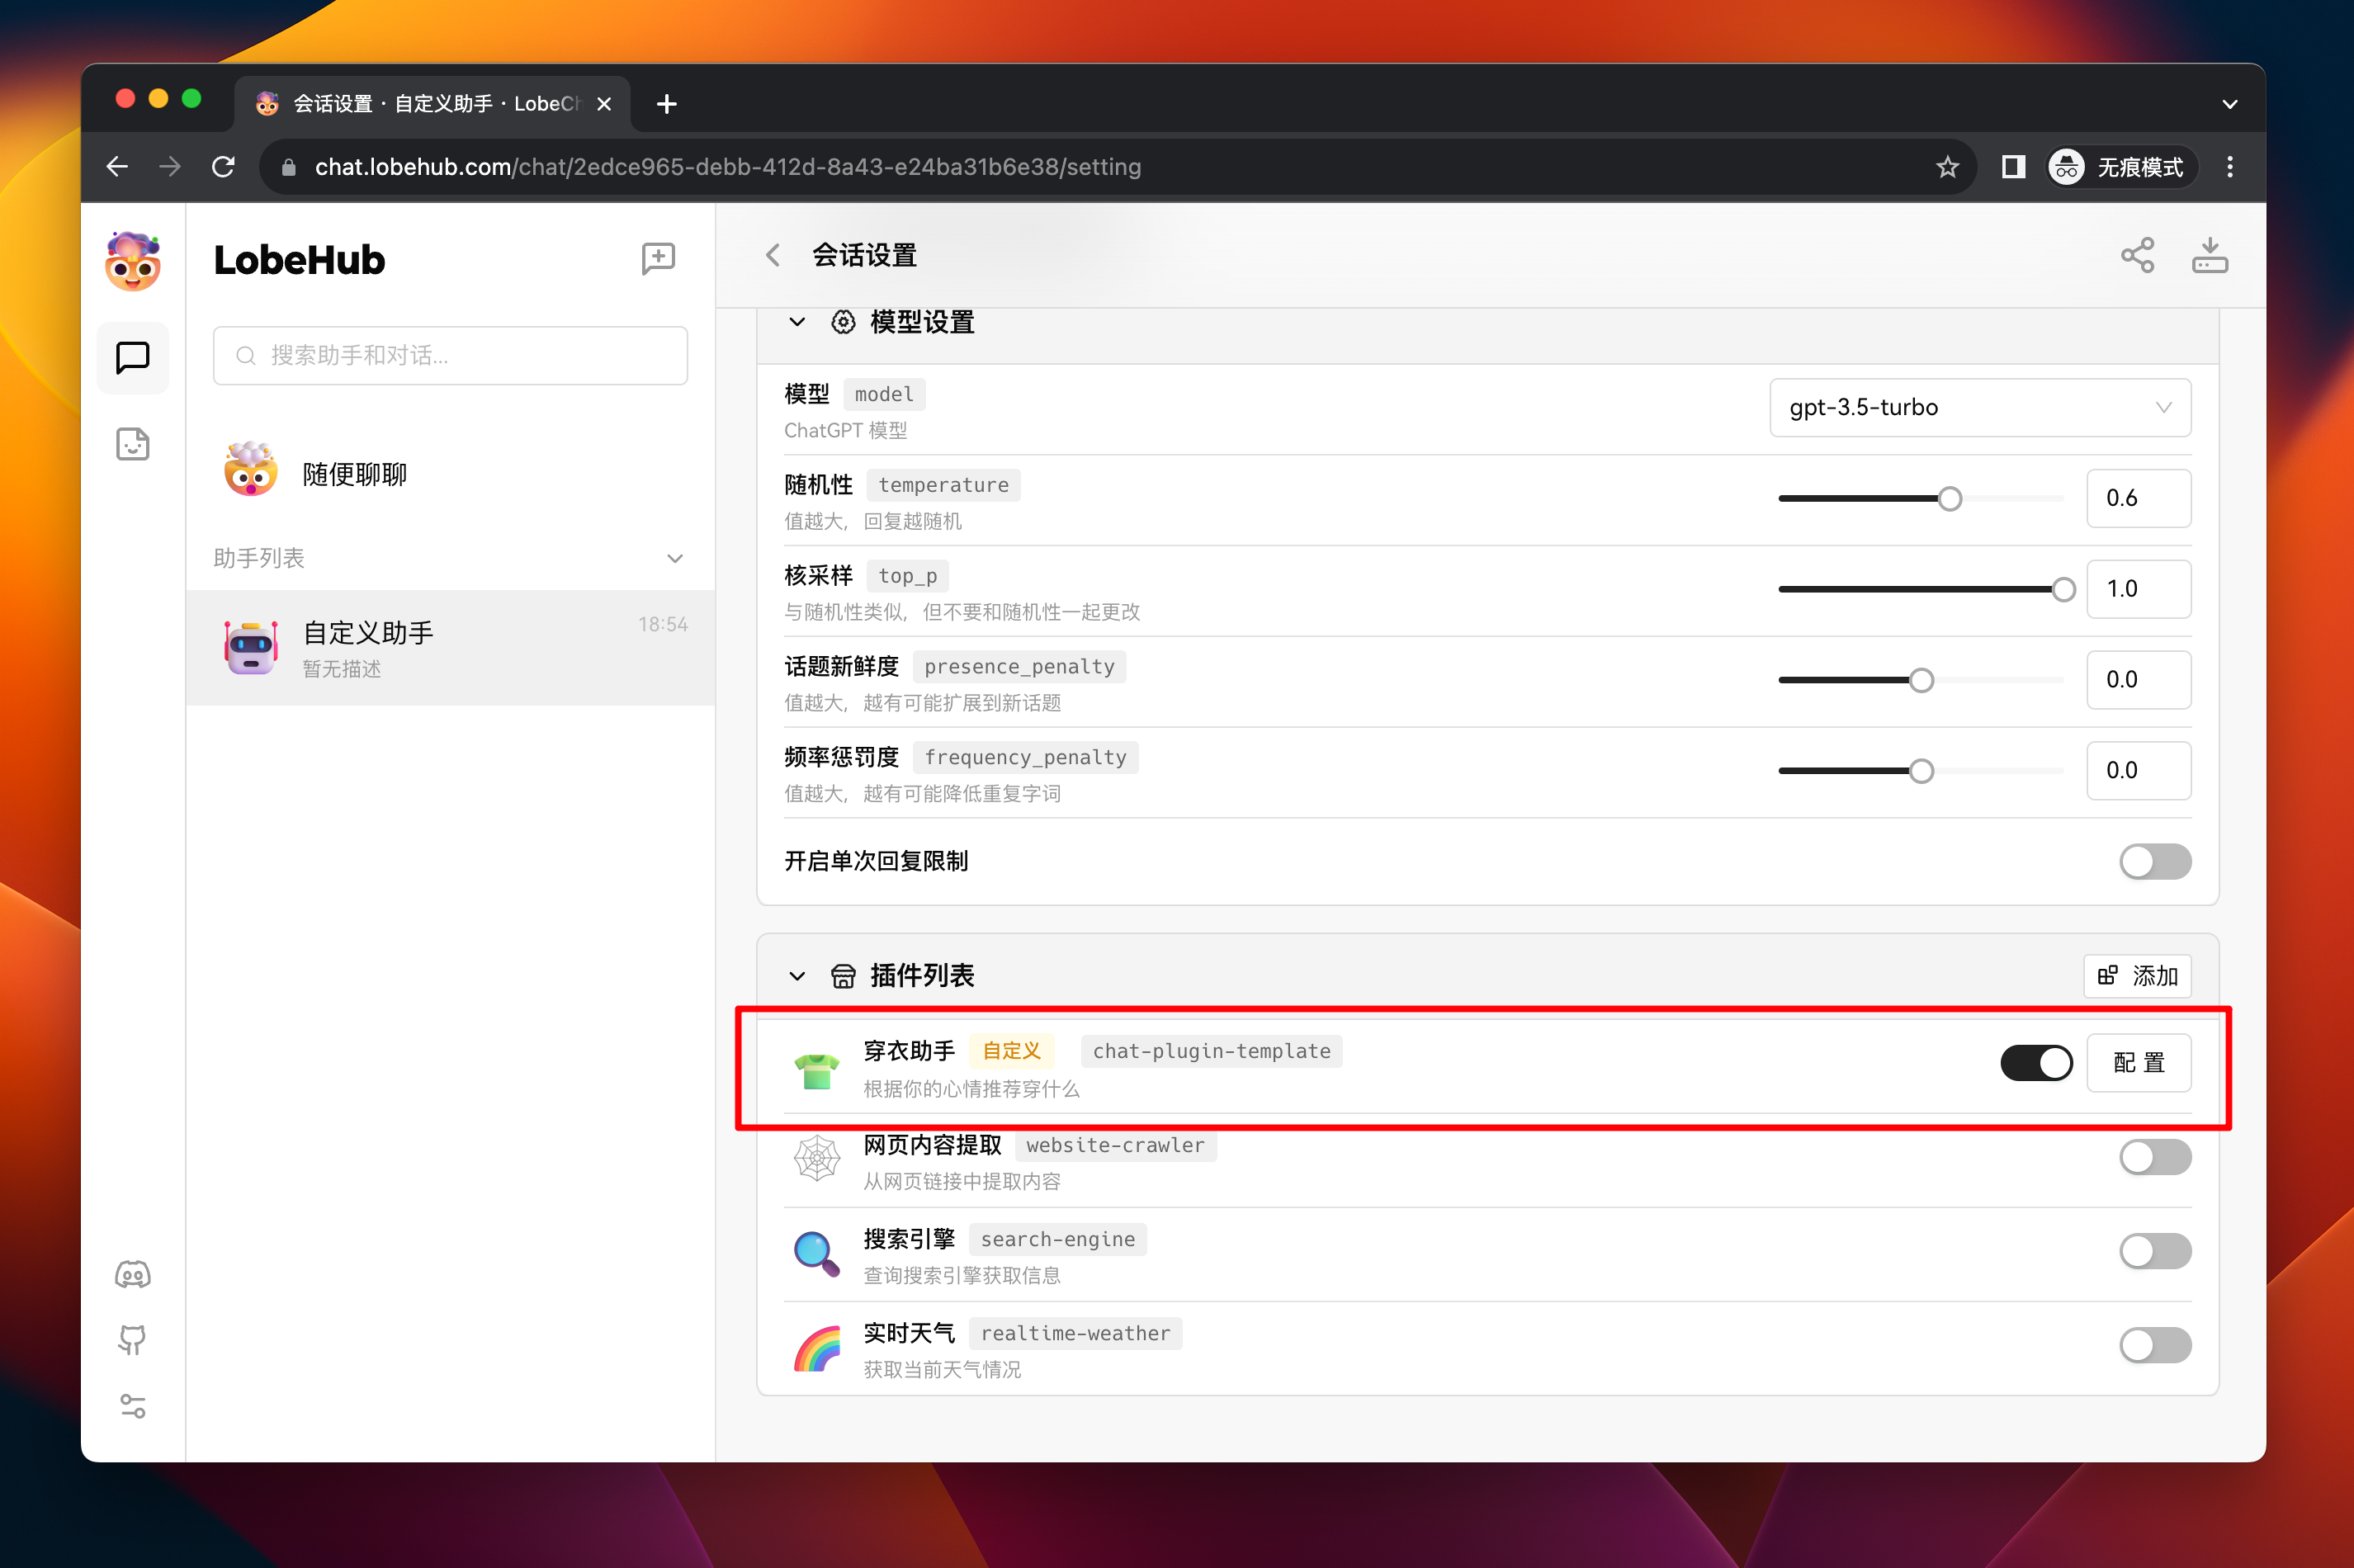
Click the Add button on the right side of "Plugin List" to open the custom plugin add dialog:
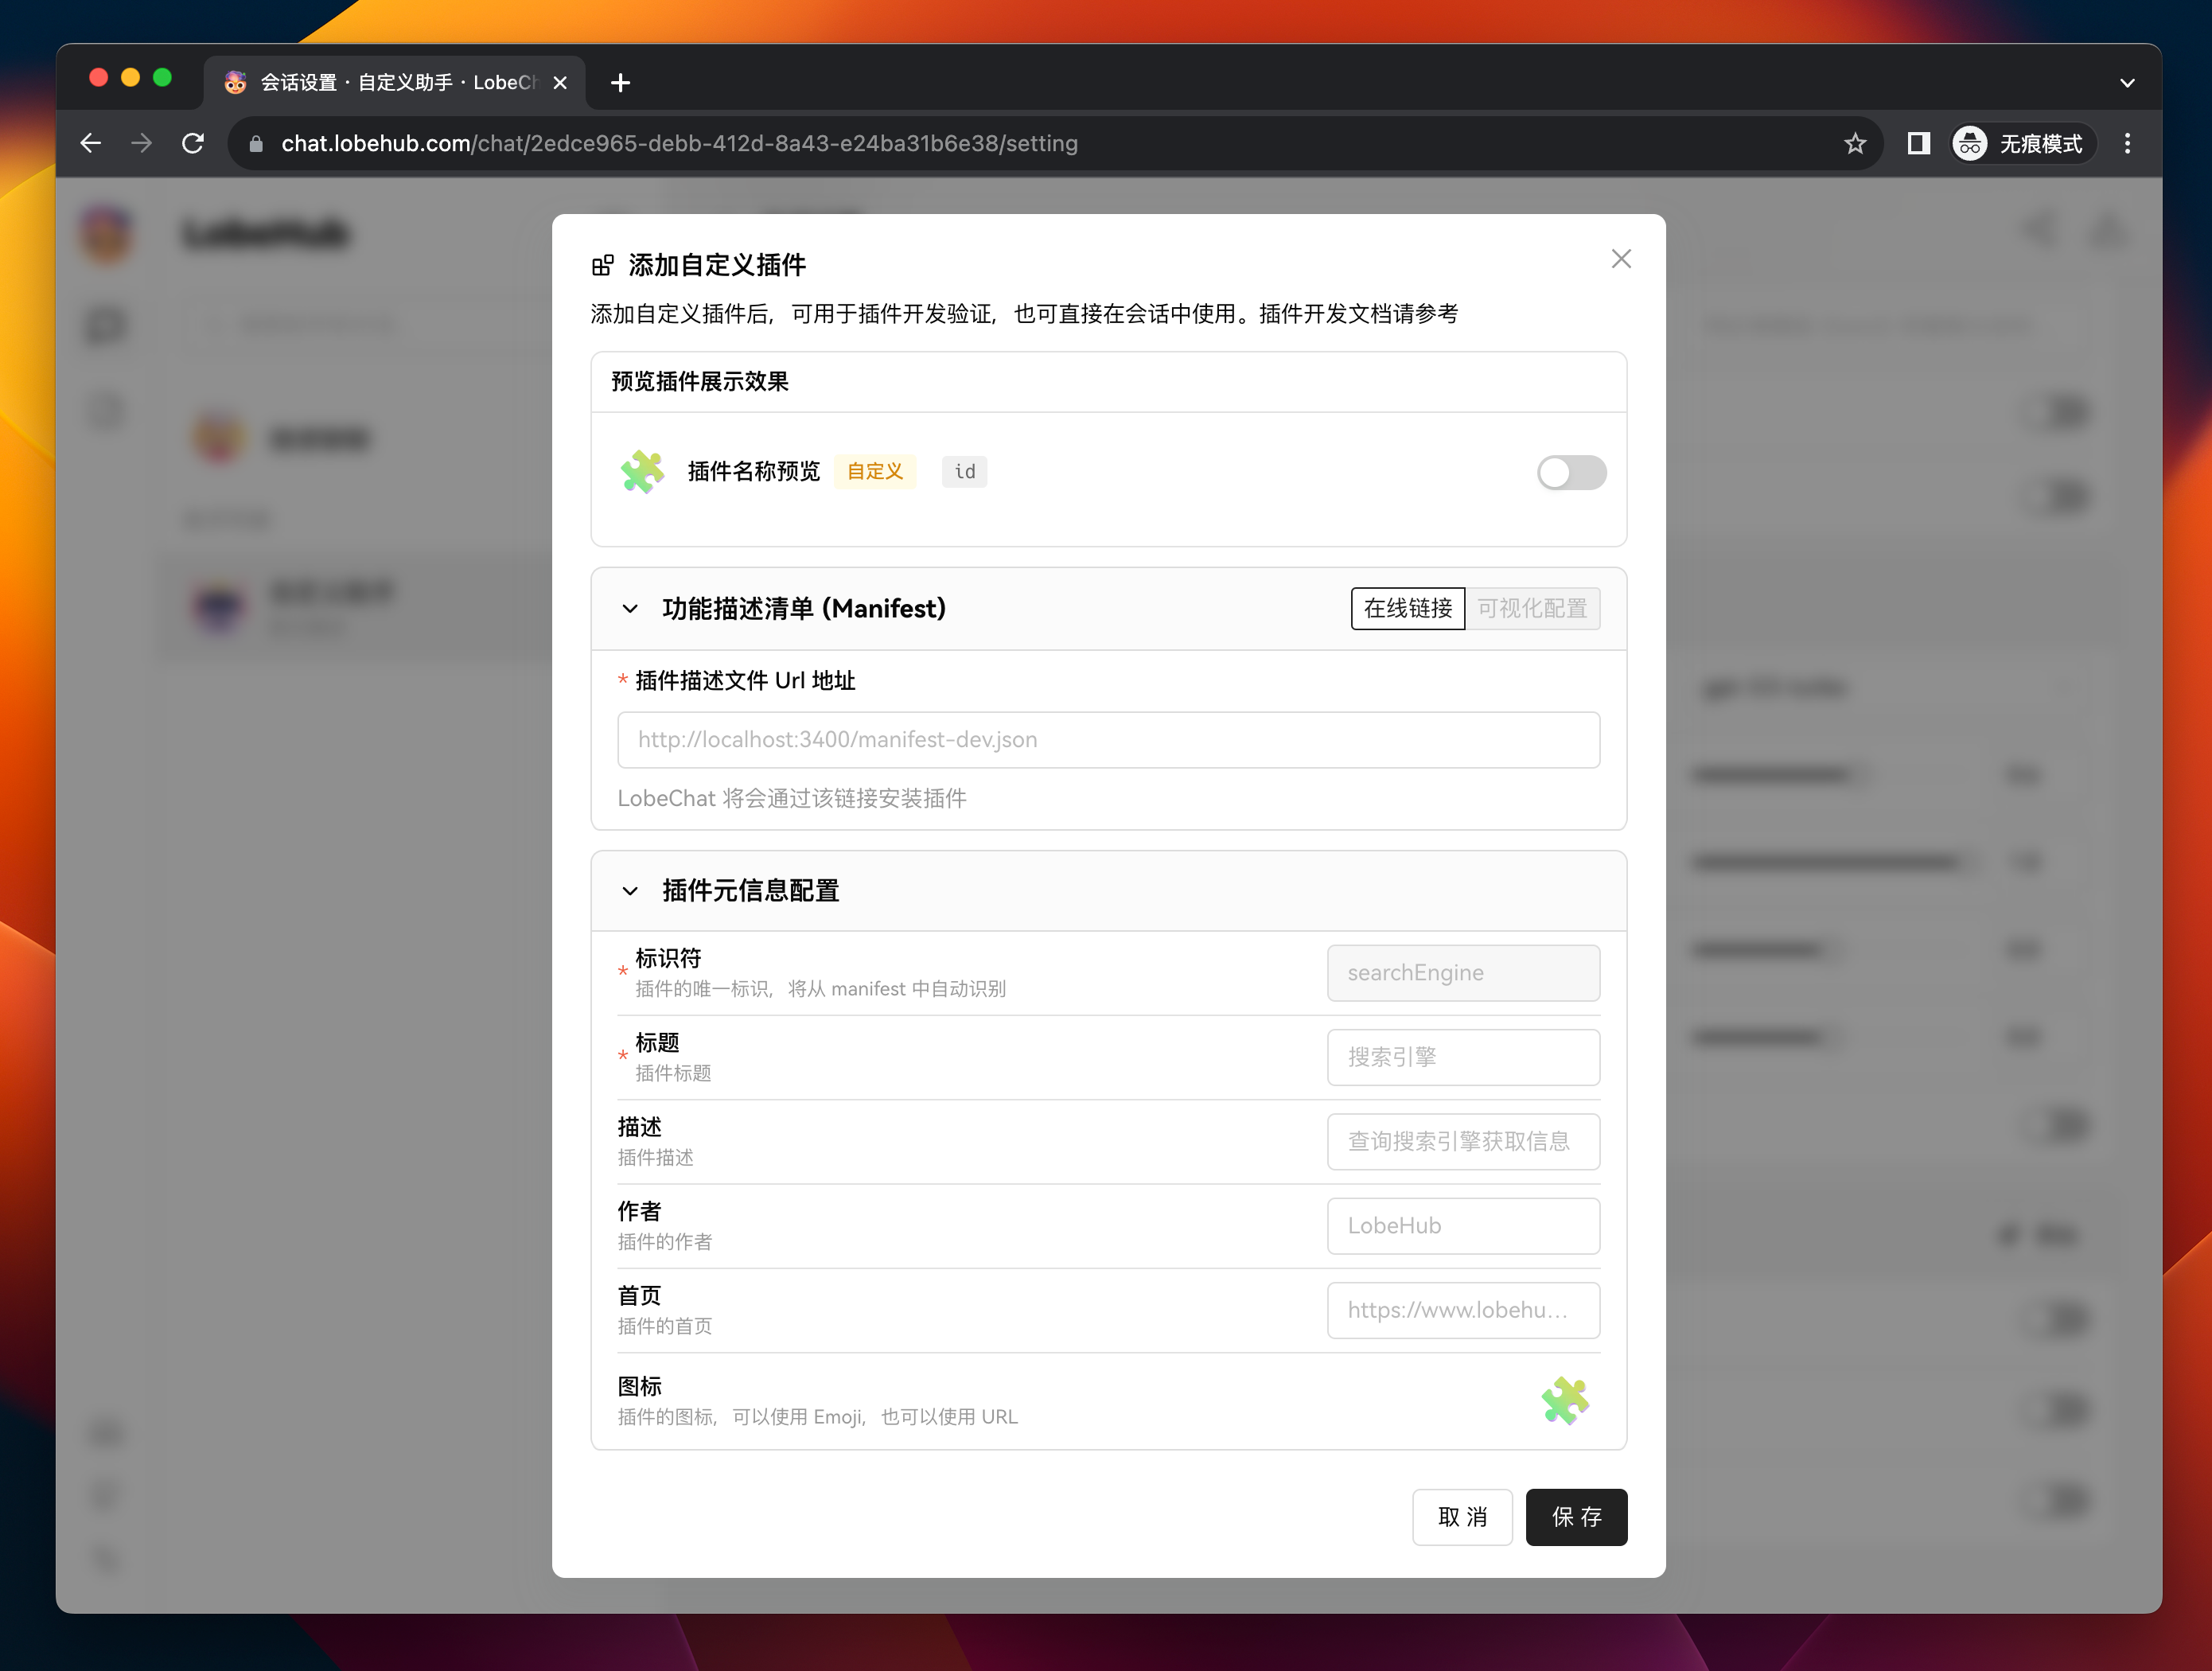
Enter http://localhost:3400/manifest-dev.json in the Plugin Manifest URL field, which is the URL of the locally started plugin manifest.
At this point, you should see that the identifier of the plugin has been automatically recognized as chat-plugin-template. Then fill in the remaining form fields (only the title is required) and click the Save button to complete the custom plugin addition.
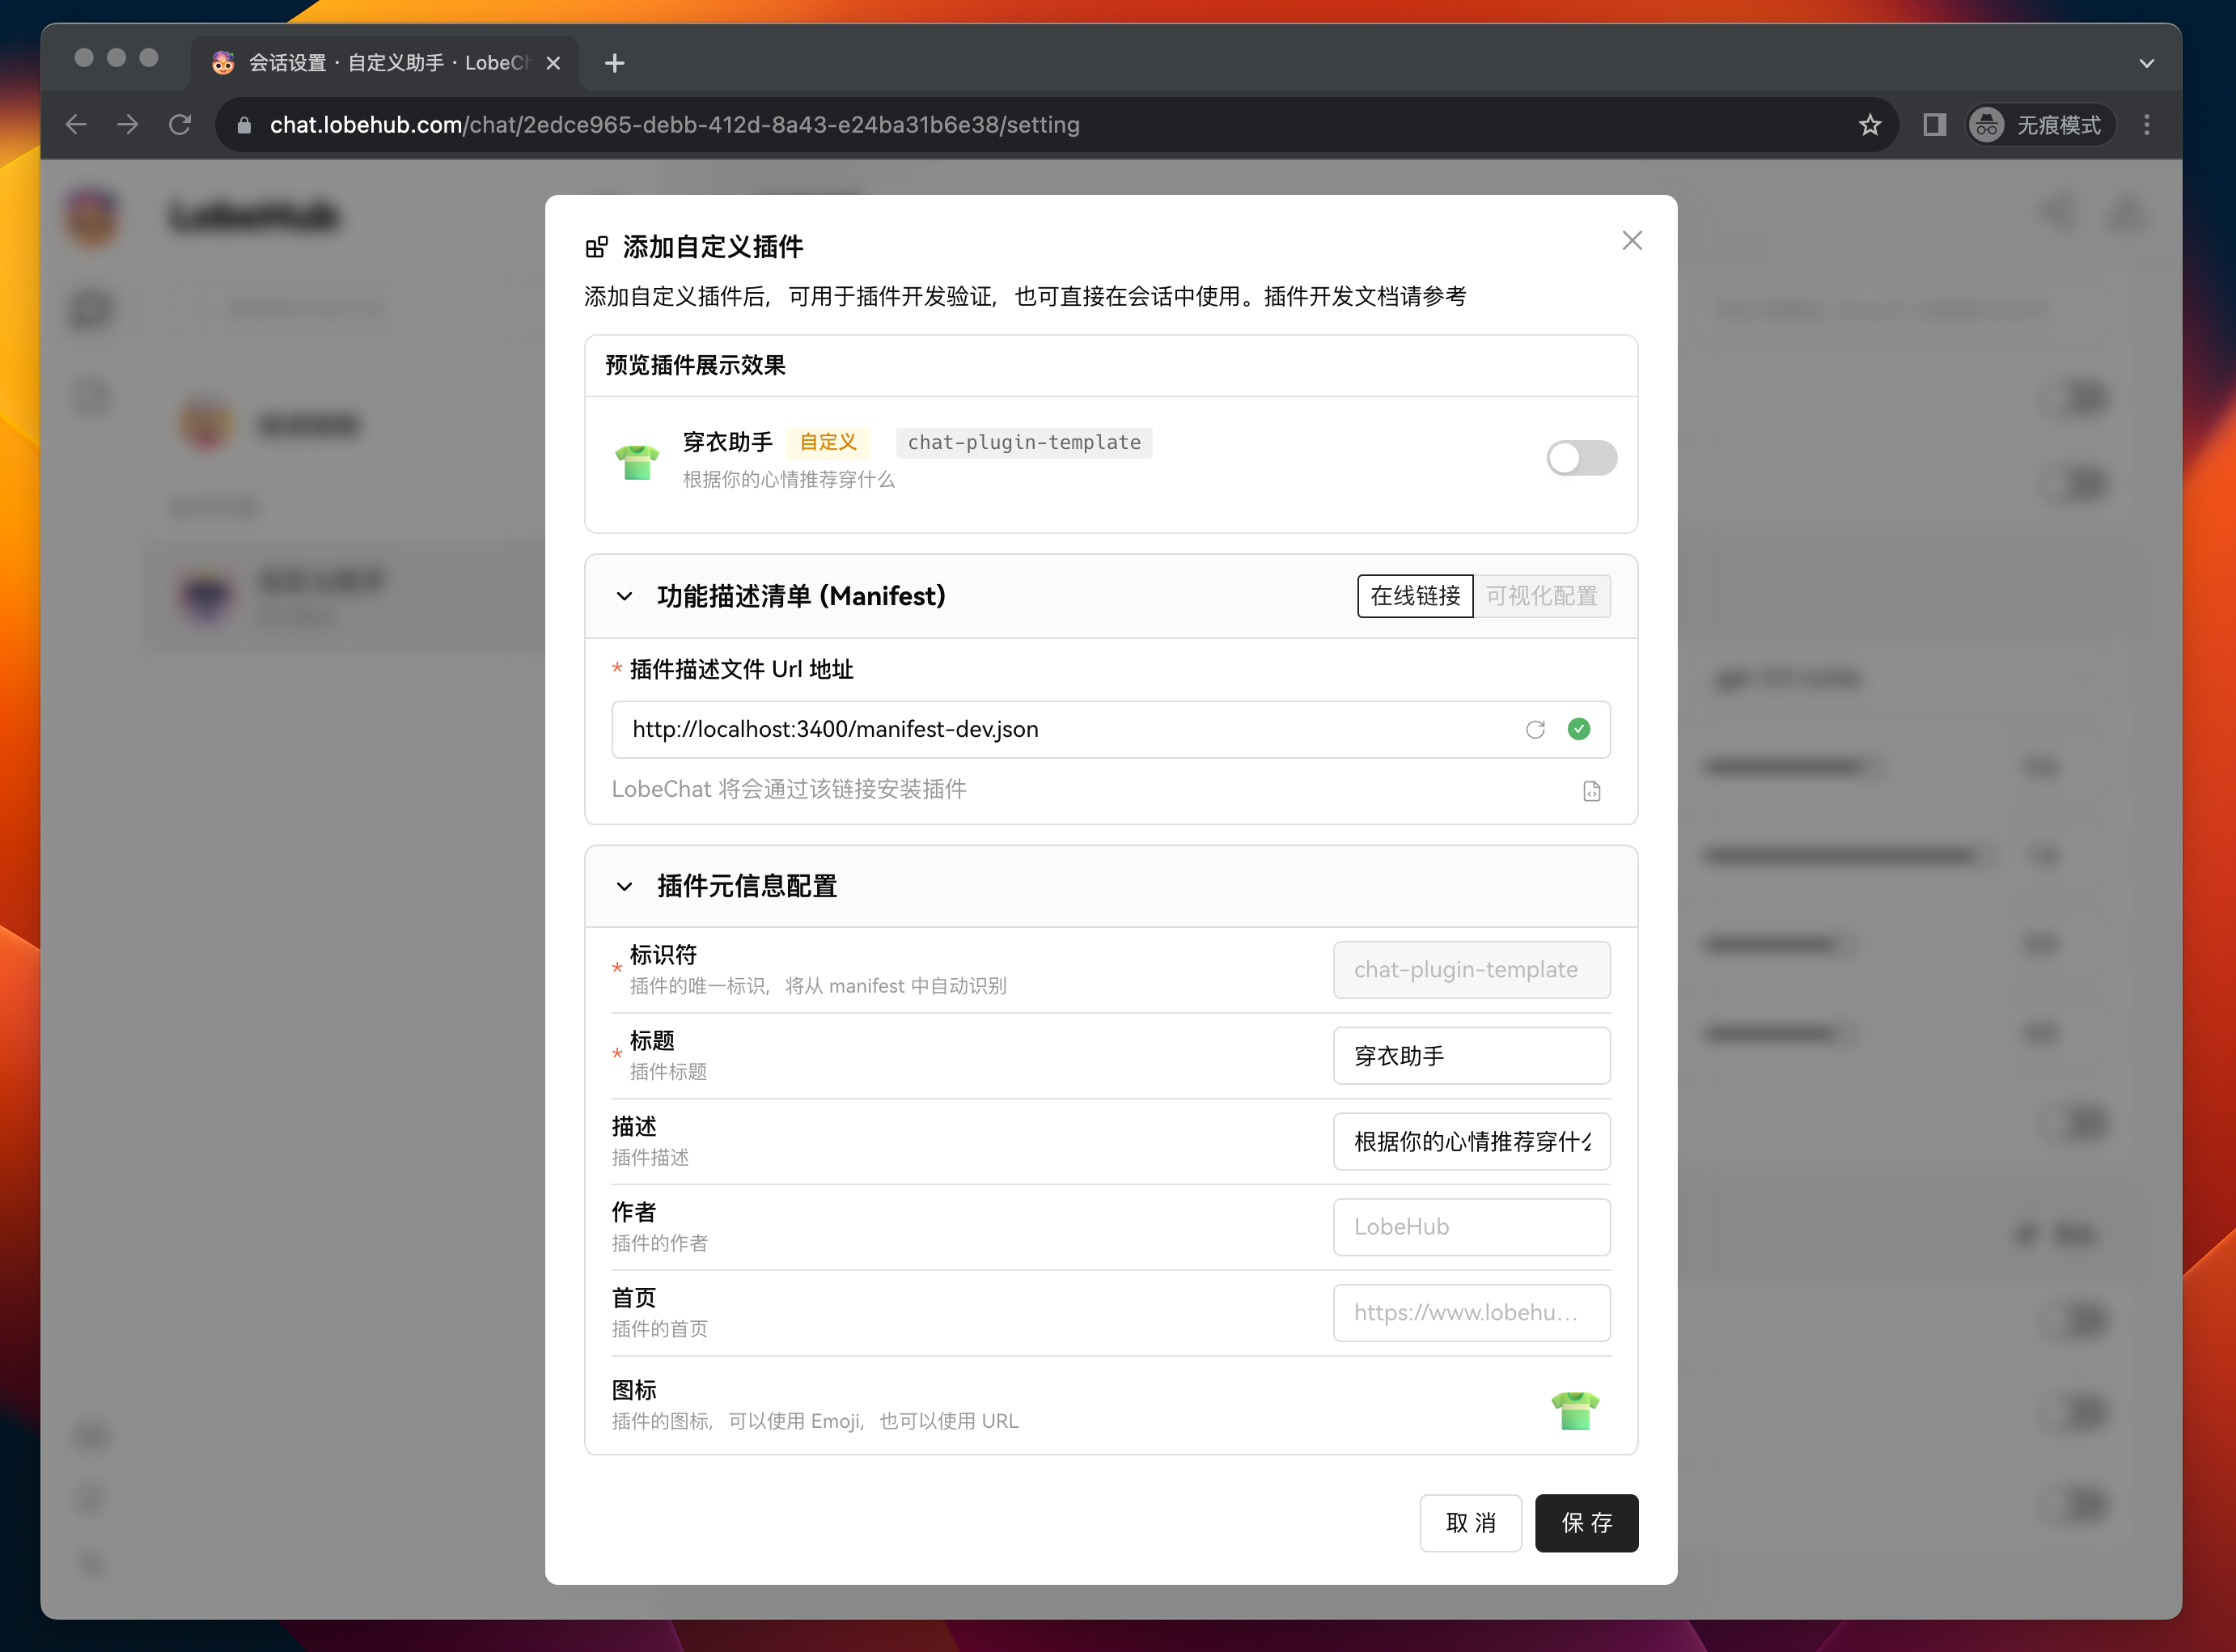
After adding the plugin, you can see the newly added plugin in the plugin list. If you need to modify the plugin's configuration, you can click the Settings button to make changes.
3 Test the Plugin Functionality in a Session
Next, we need to test the functionality of the custom plugin.
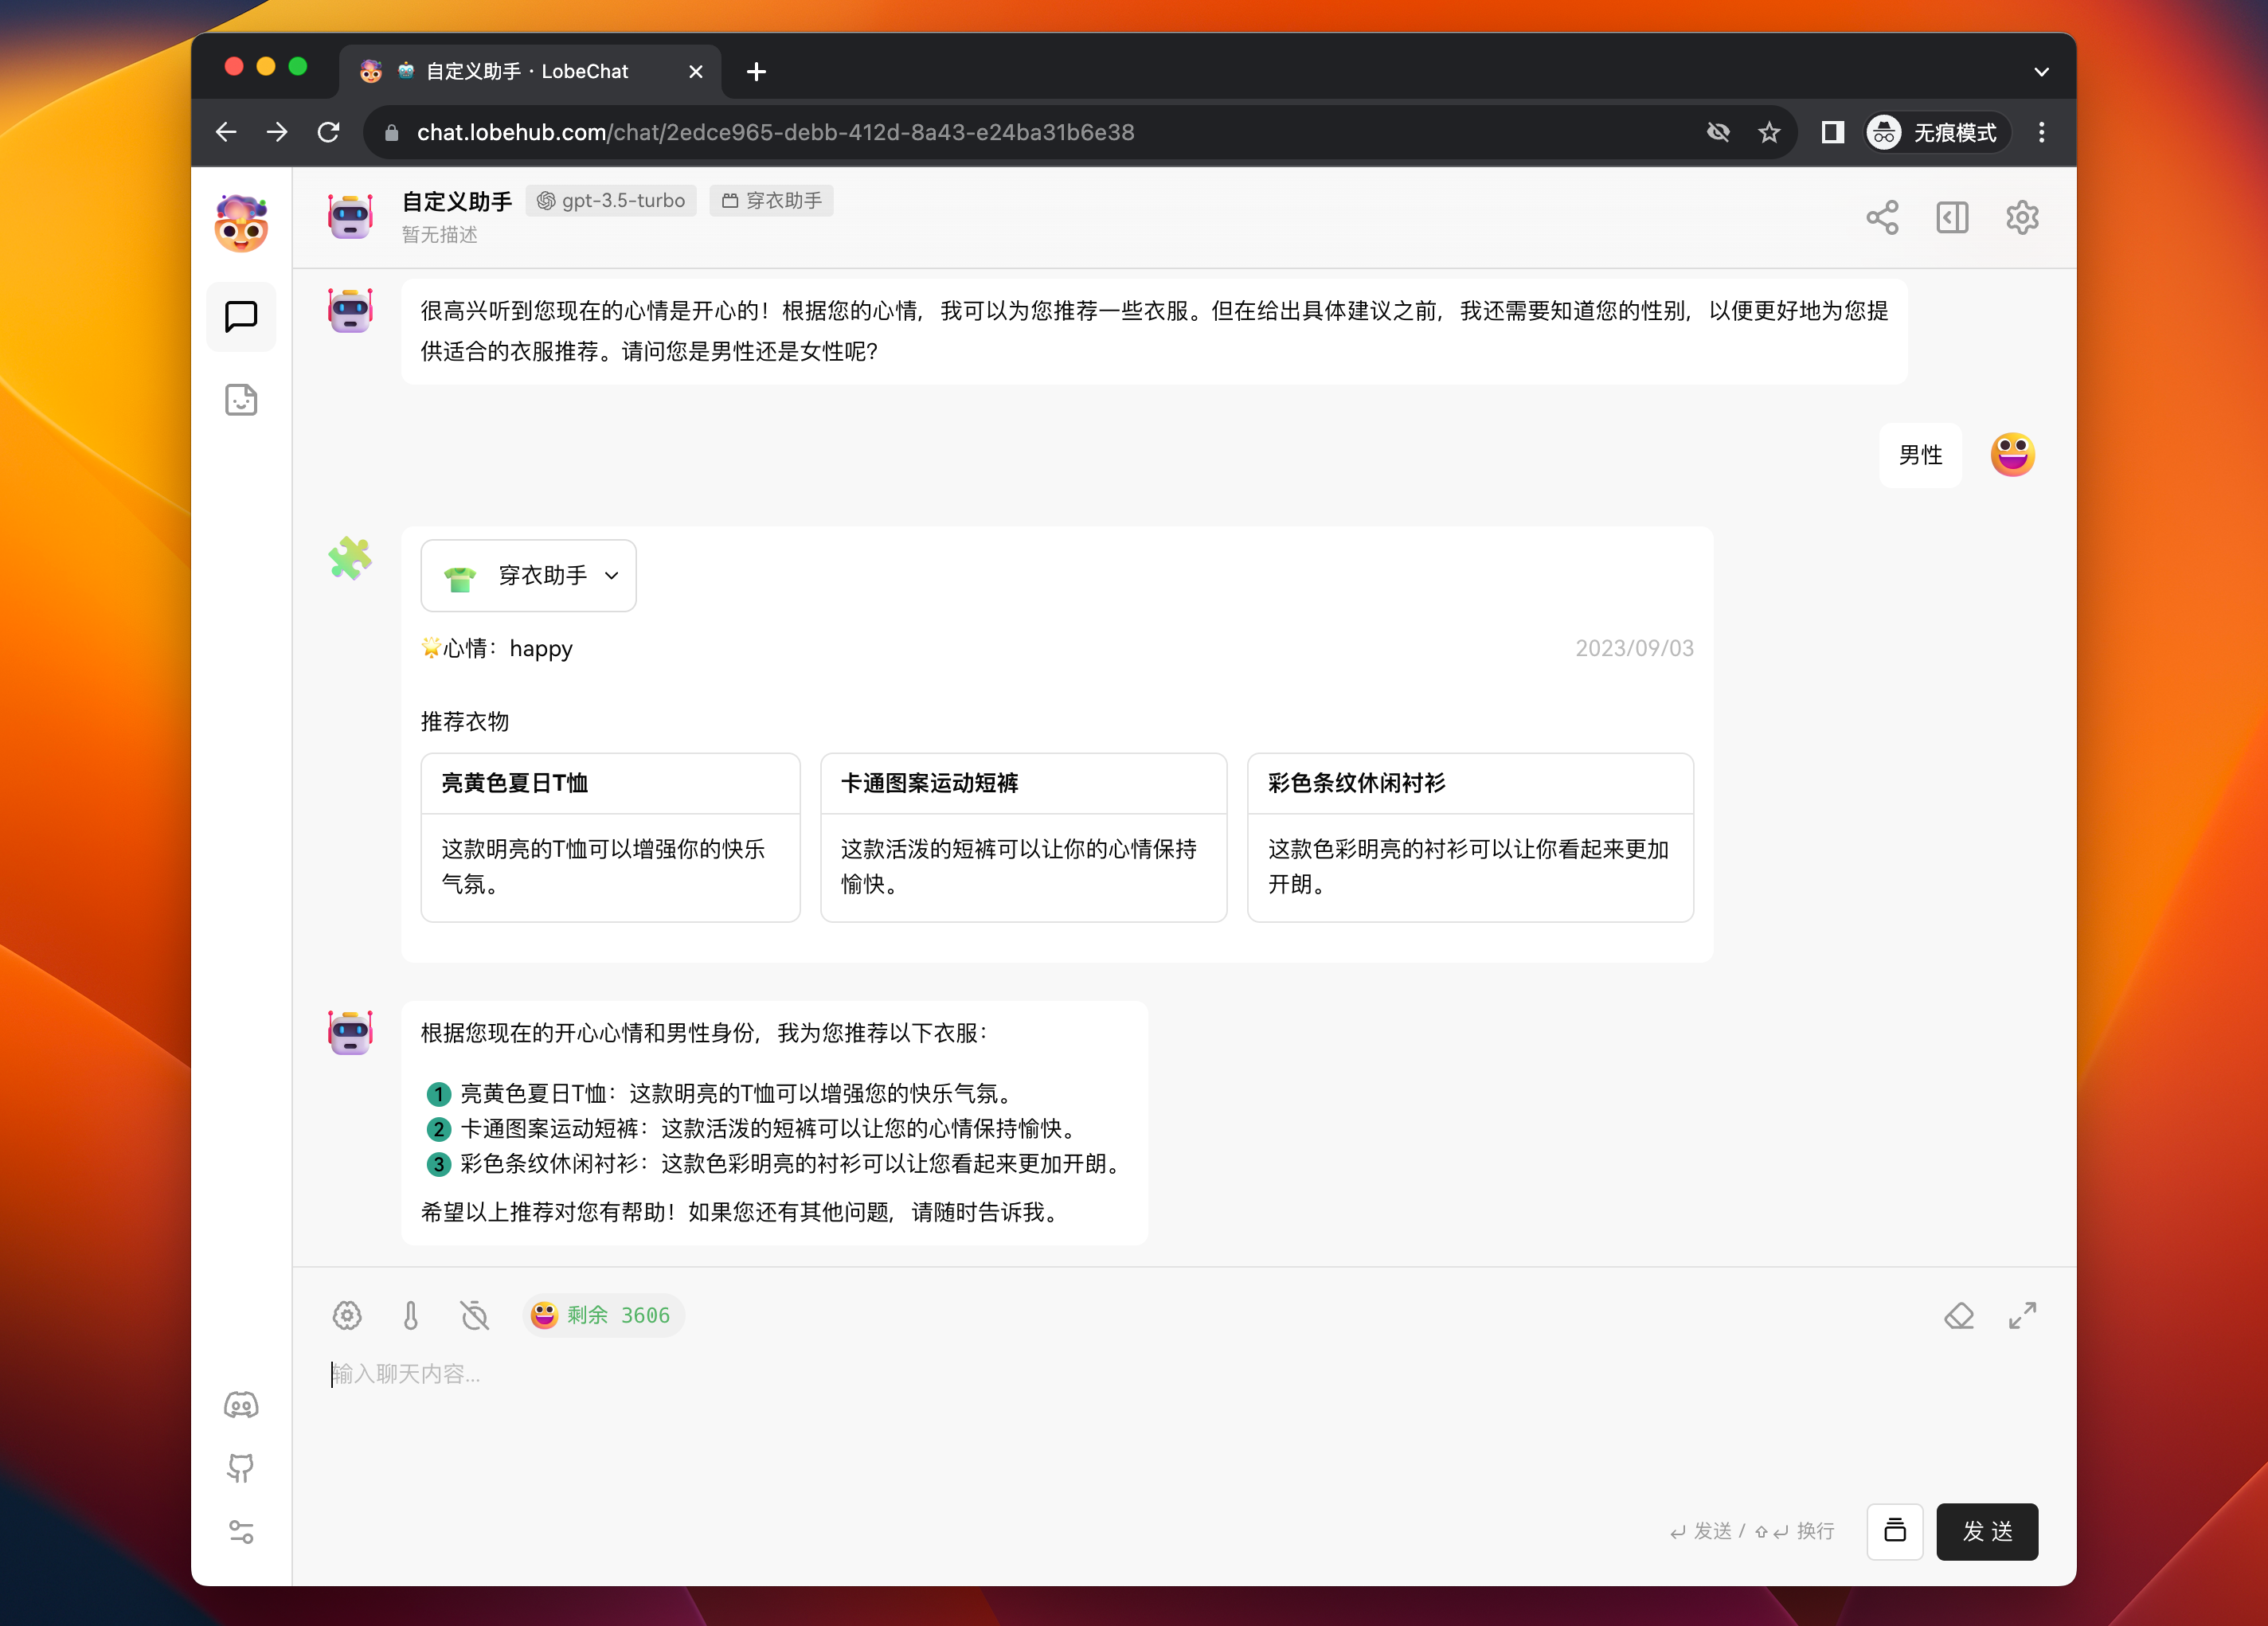
Click the Back button to go back to the session area, and then send a message to the assistant: "What should I wear?" The assistant will try to ask you about your gender and current mood.
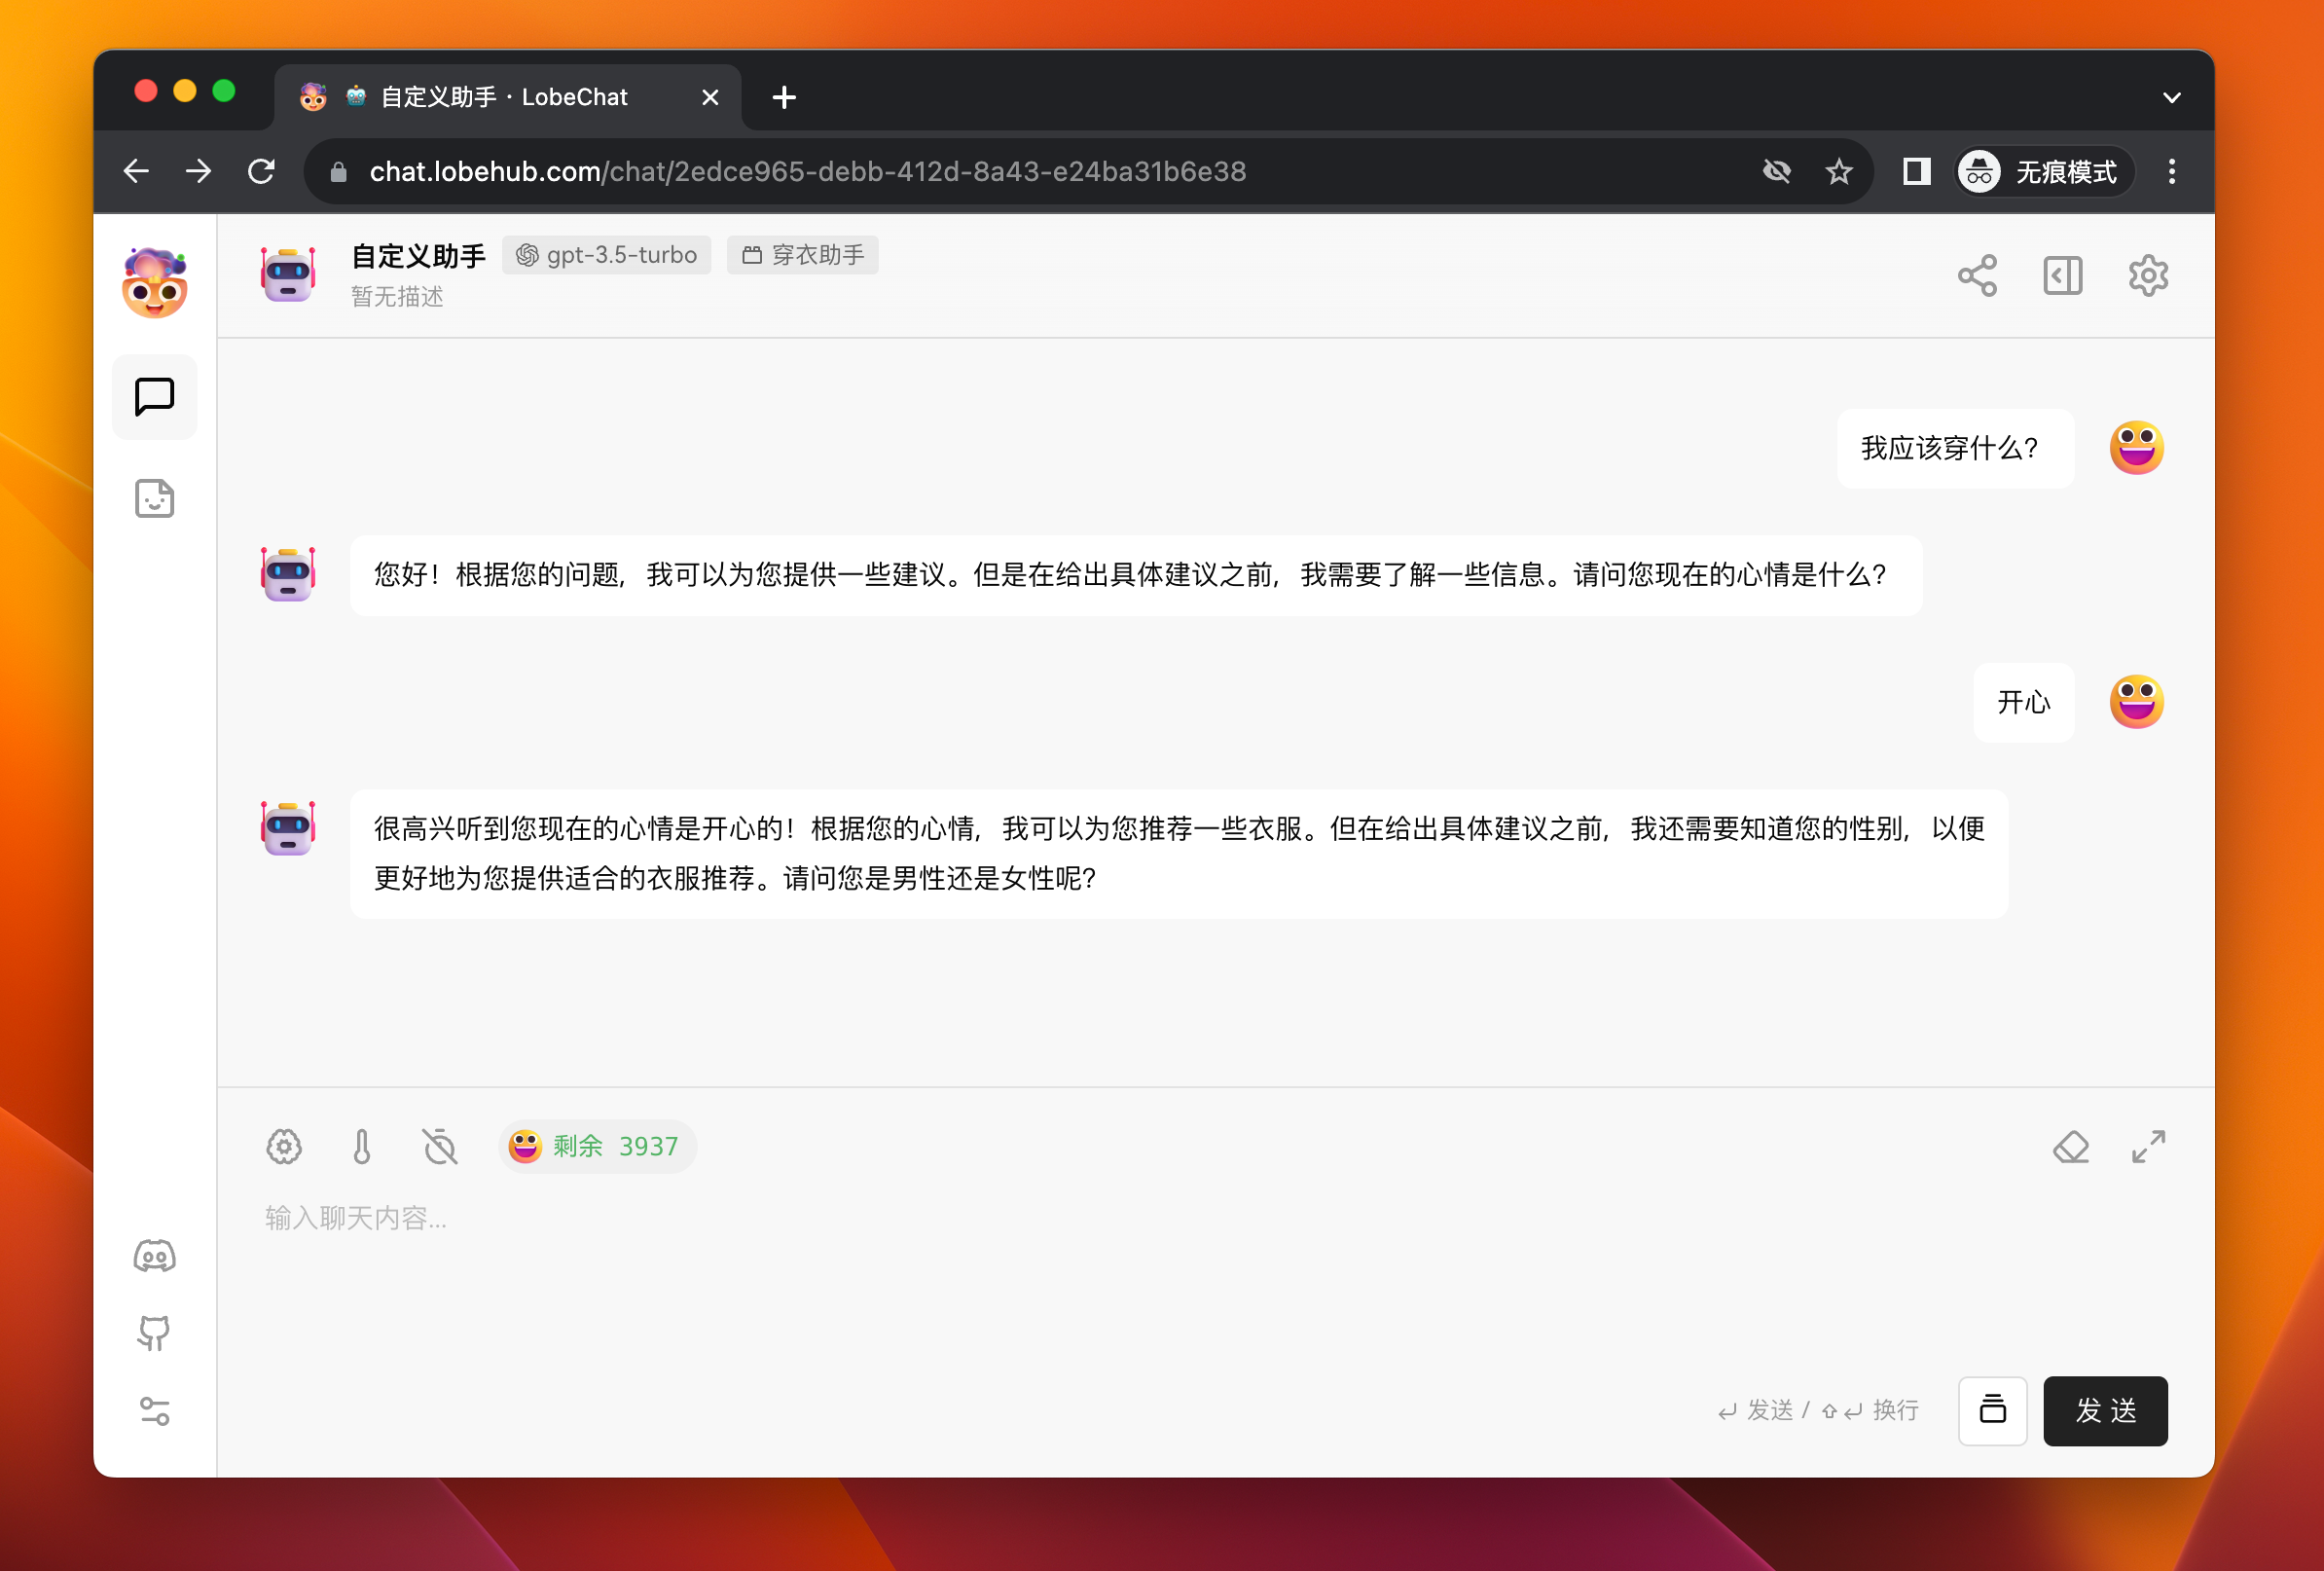
After answering, the assistant will make a plugin call to retrieve recommended clothing data based on your gender and mood from the server and push it to you. Finally, it will summarize the information in a text response.
After completing these steps, you have learned the basic process of adding and using a custom plugin in LobeChat.
Local Plugin Development
In the previous workflow, we have learned how to add and use a plugin. Now let's focus on the development process of custom plugins.
Manifest
The manifest aggregates information about how the plugin's functionality is implemented. The core fields are api and ui, which describe the server-side API capabilities and the frontend rendering interface address of the plugin, respectively.
Taking the manifest in our template as an example:
{
  "api": [
    {
      "url": "http://localhost:3400/api/clothes",
      "name": "recommendClothes",
      "description": "Recommend clothes based on the user's mood",
      "parameters": {
        "properties": {
          "mood": {
            "description": "The user's current mood, with optional values: happy, sad, anger, fear, surprise, disgust",
            "enums": ["happy", "sad", "anger", "fear", "surprise", "disgust"],
            "type": "string"
          },
          "gender": {
            "type": "string",
            "enum": ["man", "woman"],
            "description": "The gender of the user, which needs to be asked before knowing this information"
          }
        },
        "required": ["mood", "gender"],
        "type": "object"
      }
    }
  ],
  "gateway": "http://localhost:3400/api/gateway",
  "identifier": "chat-plugin-template",
  "ui": {
    "url": "http://localhost:3400",
    "height": 200
  },
  "version": "1"
}
In this manifest, the following parts are included:
identifier: This is the unique identifier of the plugin, used to distinguish different plugins. This field needs to be globally unique.api: This is an array that contains all the API interface information provided by the plugin. Each interface includes theurl,name,description, andparametersfields, all of which are required. Thedescriptionandparametersfields will be sent to GPT as thefunctionsparameter of the Function Call. The parameters need to comply with the JSON Schema specification. In this example, the API interface is namedrecommendClothes, which recommends clothes based on the user's mood and gender. The parameters of the interface include the user's mood and gender, both of which are required.ui: This field contains information about the plugin's user interface, indicating where LobeChat loads the frontend interface of the plugin from. Since the plugin interface loading in LobeChat is implemented based oniframe, you can specify the height and width of the plugin interface as needed.gateway: This field specifies the gateway for LobeChat to query API interfaces. The default plugin gateway in LobeChat is a cloud service, but for custom plugins, the requests need to be sent to the local service. Therefore, by specifying the gateway in the manifest, LobeChat will directly request this address and access the local plugin service. The gateway field does not need to be specified for plugins published online.version: This is the version number of the plugin, which is currently not used.
In actual development, you can modify the plugin's manifest according to your needs to declare the functionality you want to implement. For a complete introduction to each field in the manifest, please refer to: manifest.
Project Structure
The lobe-chat-plugin-template template project uses Next.js as the development framework. Its core directory structure is as follows:
➜  chat-plugin-template
├── public
│   └── manifest-dev.json            # Manifest file
├── src
│   └── pages
│   │   ├── api                      # Next.js server-side folder
│   │   │   ├── clothes.ts           # Implementation of the recommendClothes interface
│   │   │   └── gateway.ts           # Local plugin proxy gateway
│   │   └── index.tsx                # Frontend display interface
Of course, using Next.js as the development framework in the template is just because we are familiar with Next.js and it is convenient for development. You can use any frontend framework and programming language you are familiar with as long as it can implement the functionality described in the manifest.
We also welcome contributions of plugin templates in more frameworks and languages.
Server-side
The server-side only needs to implement the API interfaces described in the manifest. In the template, we use Vercel's Edge Runtime as the server, which eliminates the need for operational maintenance.
API Implementation
For Edge Runtime, we provide the createErrorResponse method in @lobehub/chat-plugin-sdk to quickly return error responses. The currently provided error types can be found at: PluginErrorType.
Here is an example of the clothes API implementation in the template:
export default async (req: Request) => {
  if (req.method !== 'POST') return createErrorResponse(PluginErrorType.MethodNotAllowed);

  const { gender, mood } = (await req.json()) as RequestData;

  const clothes = gender === 'man' ? manClothes : womanClothes;

  const result: ResponseData = {
    clothes: clothes[mood] || [],
    mood,
    today: Date.now(),
  };

  return new Response(JSON.stringify(result));
};
In this example, manClothes and womanClothes are hardcoded mock data. In actual scenarios, they can be replaced with database queries.
Gateway
Since the default plugin gateway in LobeChat is a cloud service (</api/plugins>), which sends requests to the API addresses specified in the manifest to solve the cross-origin issue.
For custom plugins, the requests need to be sent to the local service. Therefore, by specifying the gateway in the manifest (http://localhost:3400/api/gateway), LobeChat will directly request this address. Then you only need to create a gateway implementation at this address.
import { createLobeChatPluginGateway } from '@lobehub/chat-plugins-gateway';

export const config = {
  runtime: 'edge',
};

export default async createLobeChatPluginGateway();
@lobehub/chat-plugins-gateway includes the implementation of the plugin gateway in LobeChat, which you can use to create a gateway. This allows LobeChat to access the local plugin service.
Plugin UI Interface
For a plugin, the UI interface is optional. For example, the Web Crawler plugin does not provide a corresponding user interface.
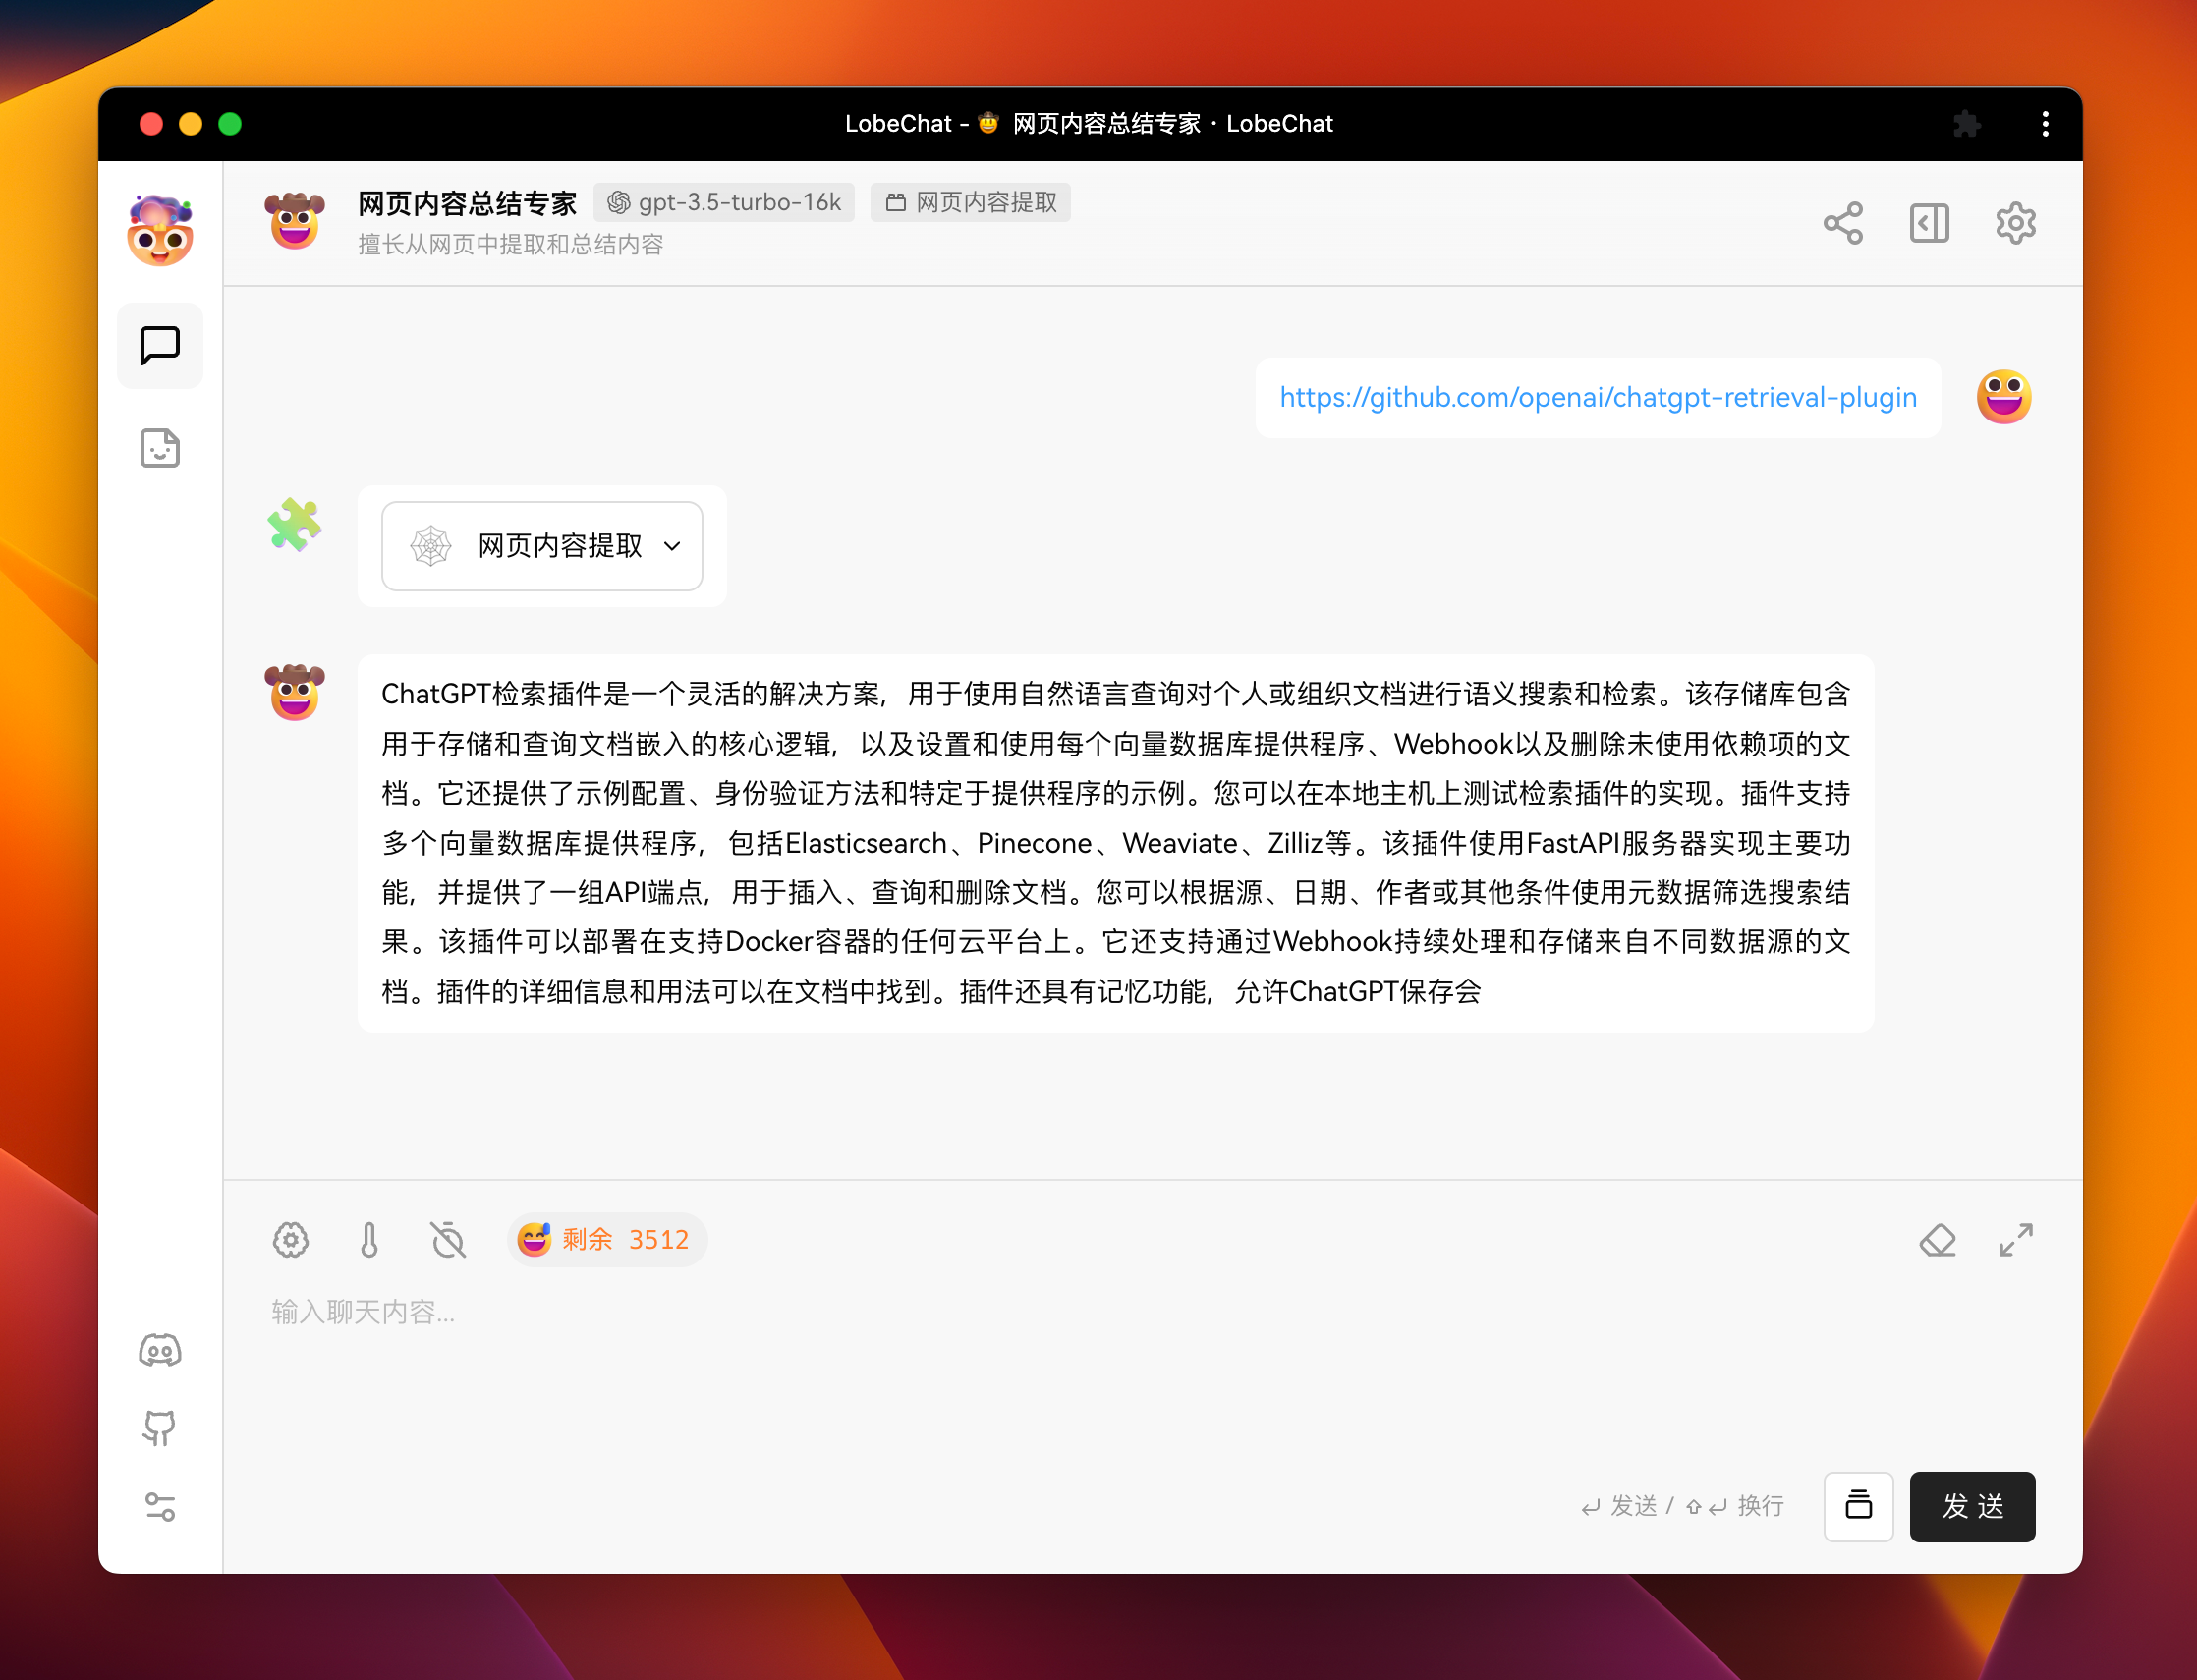
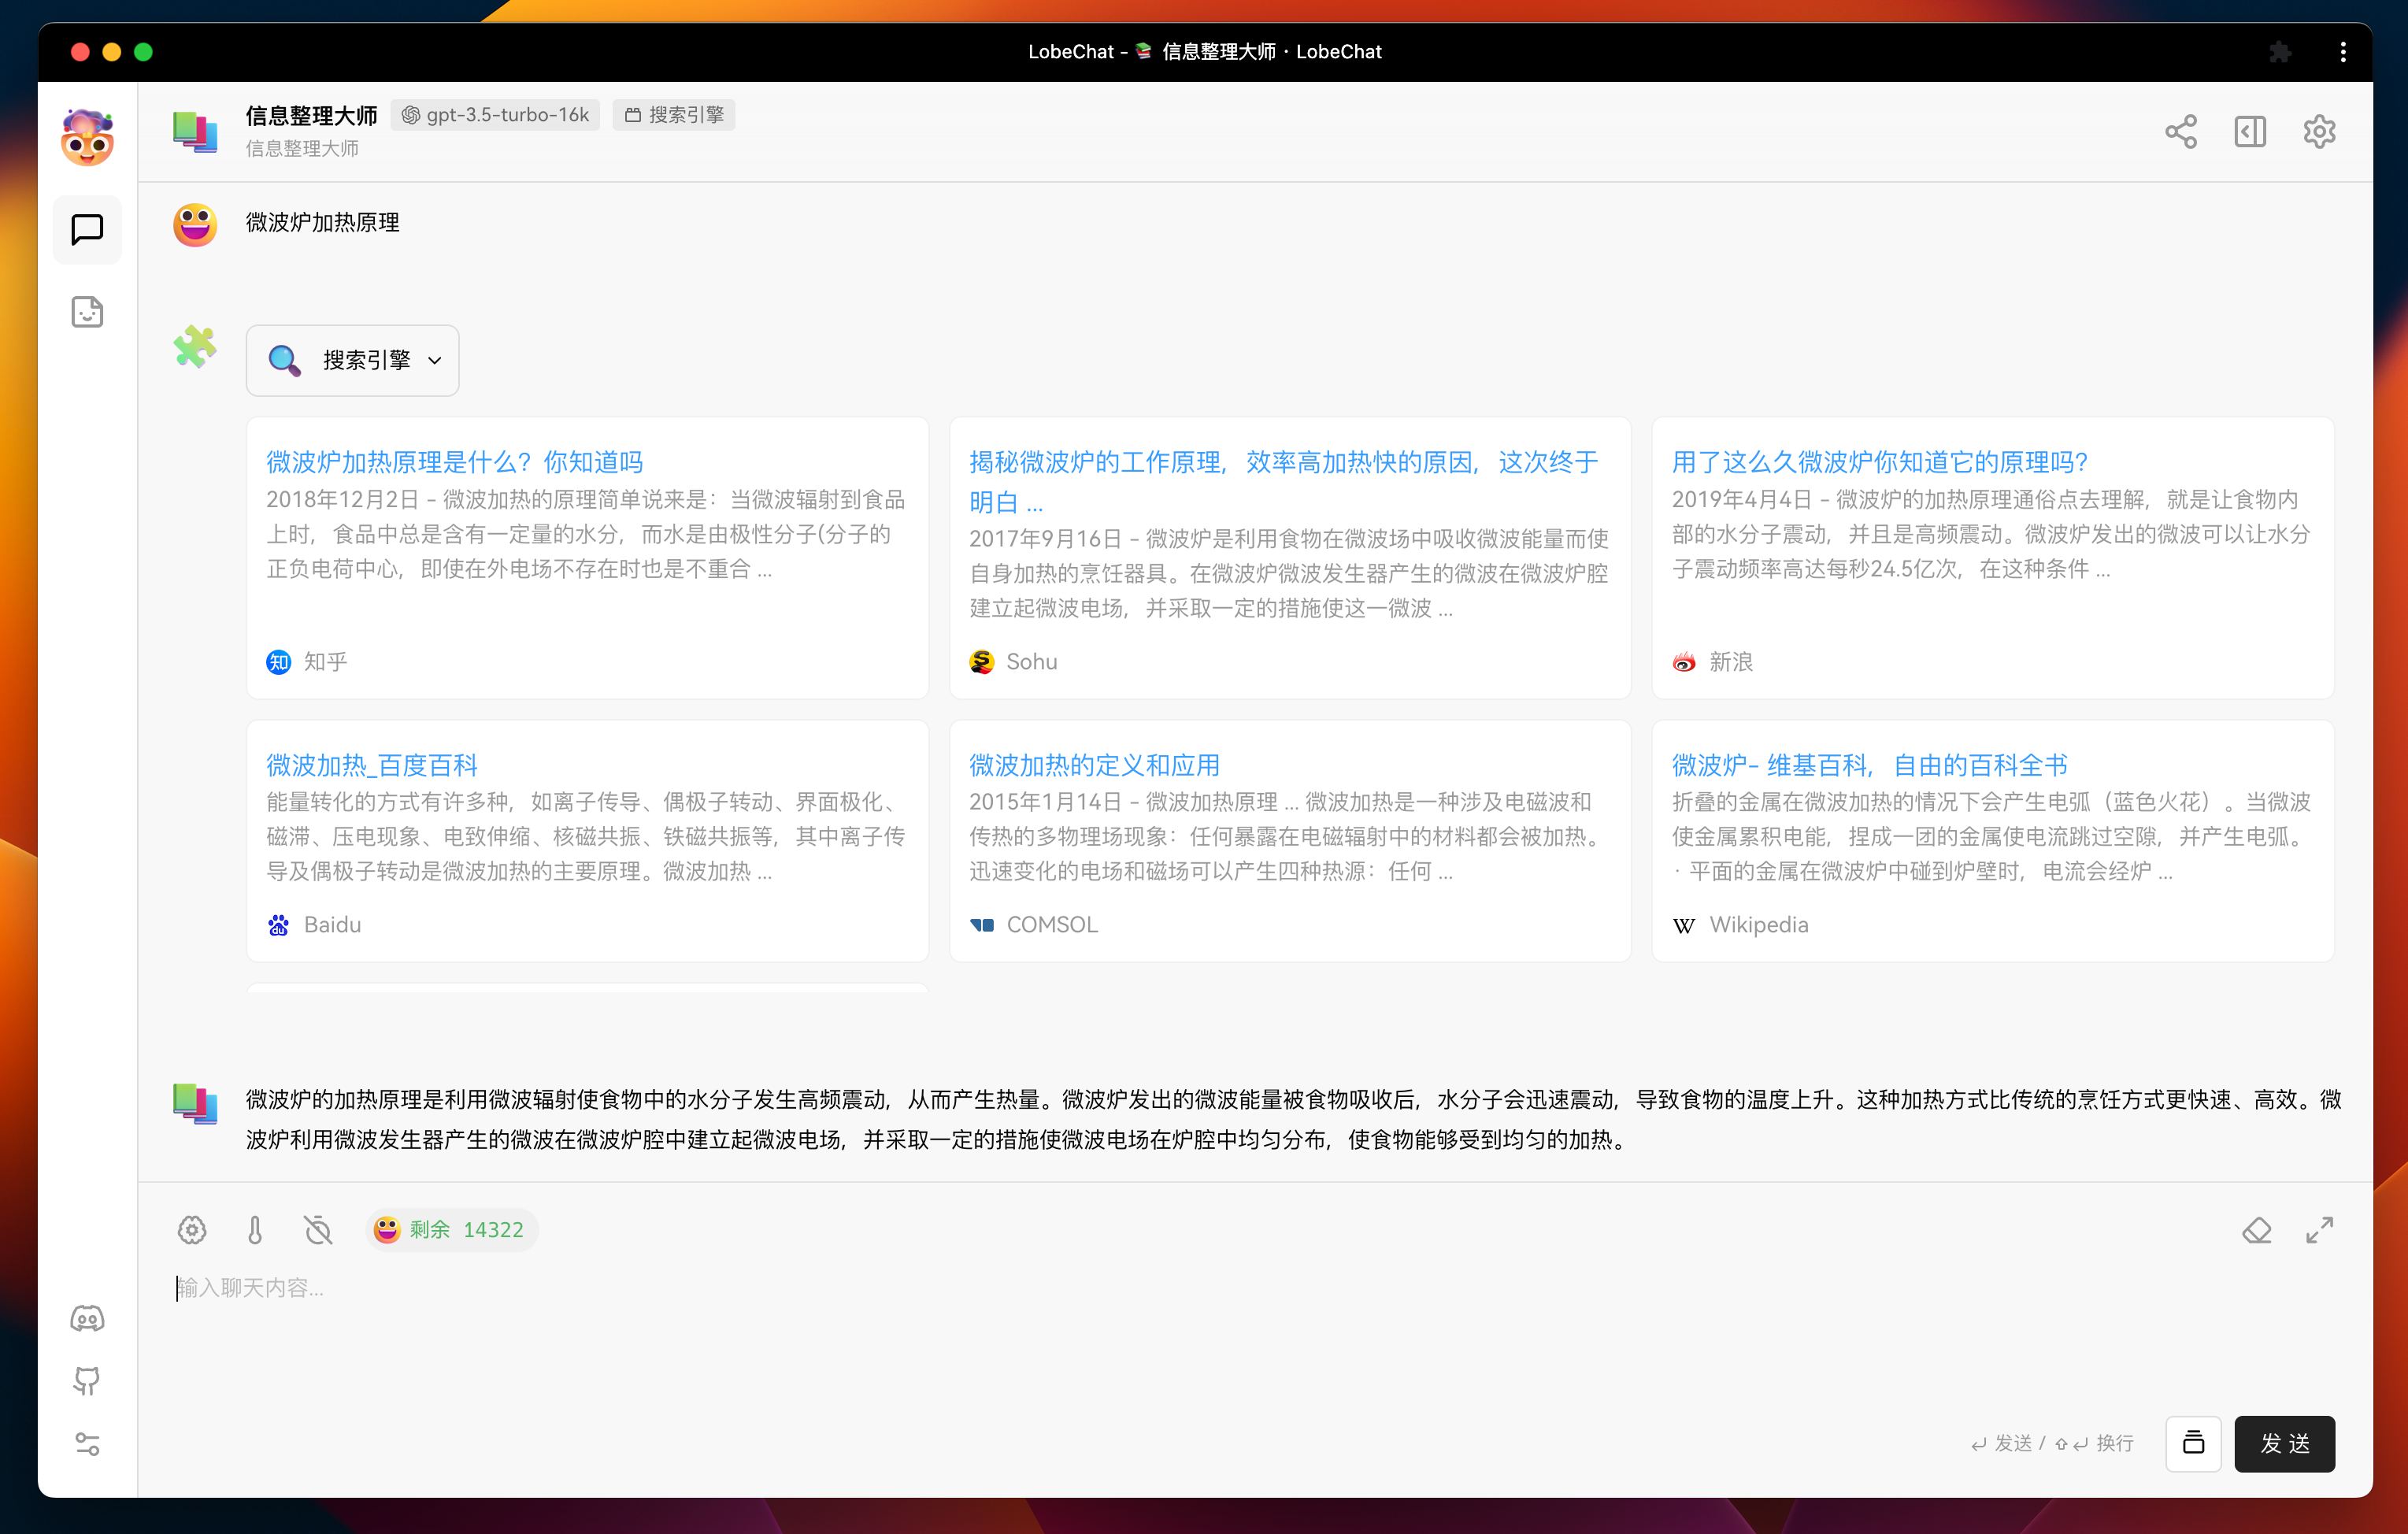
If you want to display richer information in plugin messages or include some rich interactions, you can define a user interface for the plugin. For example, the following image shows the user interface of a search engine plugin.
Plugin UI Interface Implementation
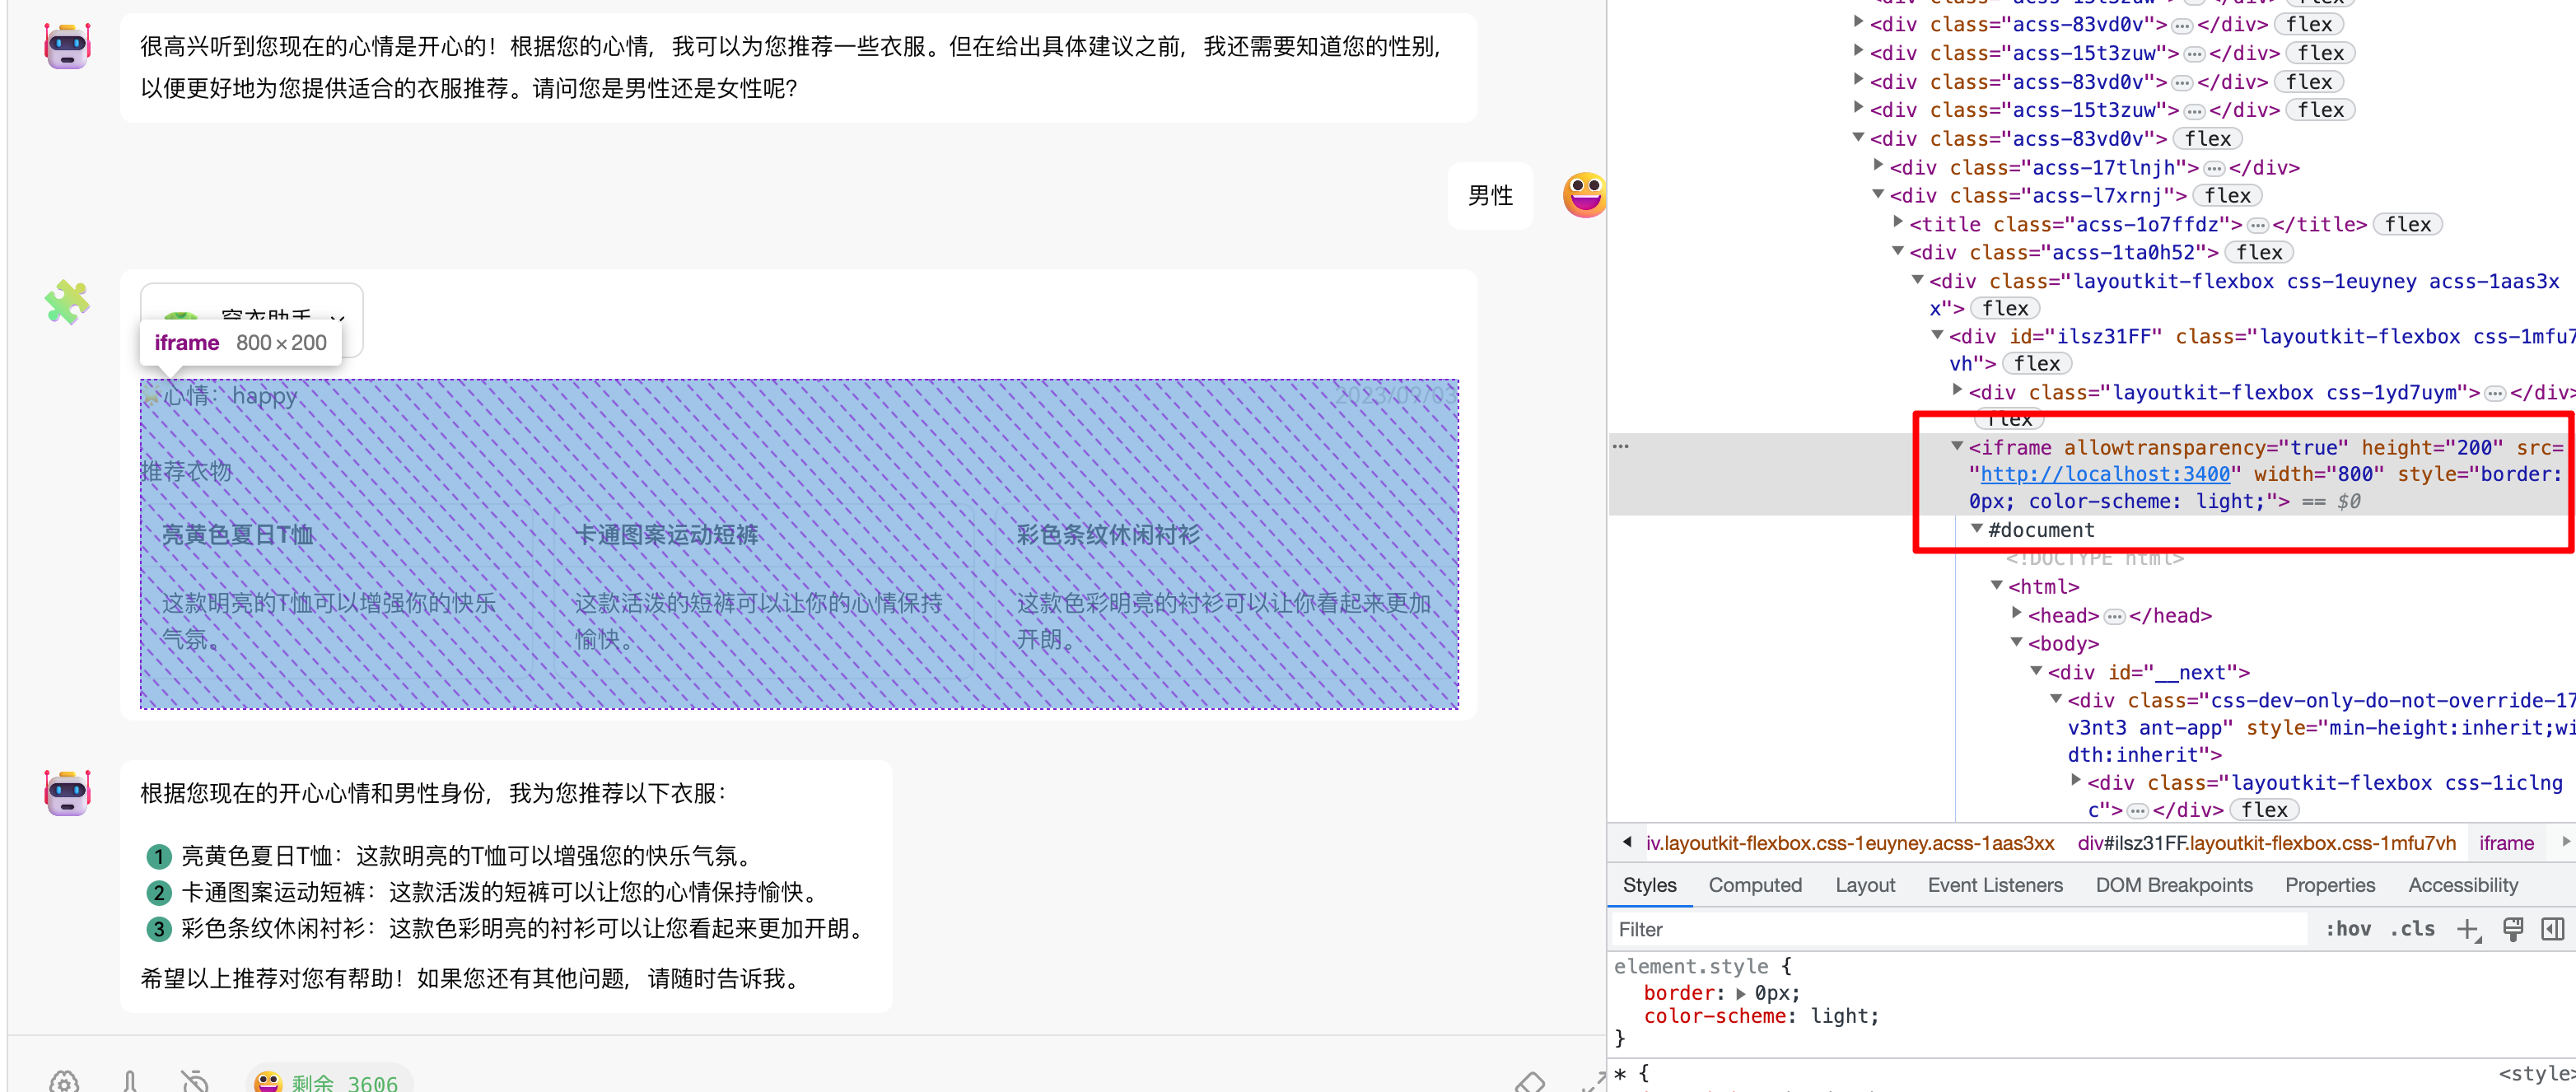
LobeChat uses iframe + postMessage to load and communicate with plugin UI. Therefore, the implementation of the plugin UI is the same as normal web development. You can use any frontend framework and programming language you are familiar with.
In our template, we use React + Next.js + antd as the frontend framework. You can find the implementation of the user interface in src/pages/index.tsx.
Regarding plugin communication, we provide related methods in @lobehub/chat-plugin-sdk to simplify the communication between the plugin and LobeChat. You can use the fetchPluginMessage method to actively retrieve the data of the current message from LobeChat. For a detailed description of this method, please refer to: fetchPluginMessage.
import { fetchPluginMessage } from '@lobehub/chat-plugin-sdk';
import { memo, useEffect, useState } from 'react';

import { ResponseData } from '@/type';

const Render = memo(() => {
  const [data, setData] = useState<ResponseData>();

  useEffect(() => {
    // Retrieve the current plugin message from LobeChat
    fetchPluginMessage().then((e: ResponseData) => {
      setData(e);
    });
  }, []);

  return <>...</>;
});

export default Render;
Plugin Deployment and Publication
After completing the plugin development, you can deploy the plugin using your preferred method. For example, you can use Vercel or package it as a Docker image for publication.
If you want more people to use your plugin, you are welcome to submit it for review in the plugin marketplace.
Plugin Shield
[](https://github.com/lobehub/lobe-chat-plugins)
Link
- 📘 Pluging SDK Docs: https://chat-plugin-sdk.lobehub.com
- 🚀 chat-plugin-template: https://github.com/lobehub/chat-plugin-template
- 🧩 chat-plugin-sdk: https://github.com/lobehub/chat-plugin-sdk
- 🚪 chat-plugin-sdk: https://github.com/lobehub/chat-plugins-gateway
- 🏪 lobe-chat-plugins: https://github.com/lobehub/lobe-chat-plugins